Lists
Learn more about ad-hoc data exploration with Pocus Lists.
Pocus Lists provide a dynamic platform for exploring and manipulating data outside of the Inbox and Playbooks. Users can customize Lists by applying filters, adding or removing fields, configuring actions, sorting results, and adjusting additional settings.
What are Lists in Pocus?
Use Pocus lists to explore and flexibly shape data outside of the Inbox and Playbooks. This document will cover the high-level concepts and features in Lists.
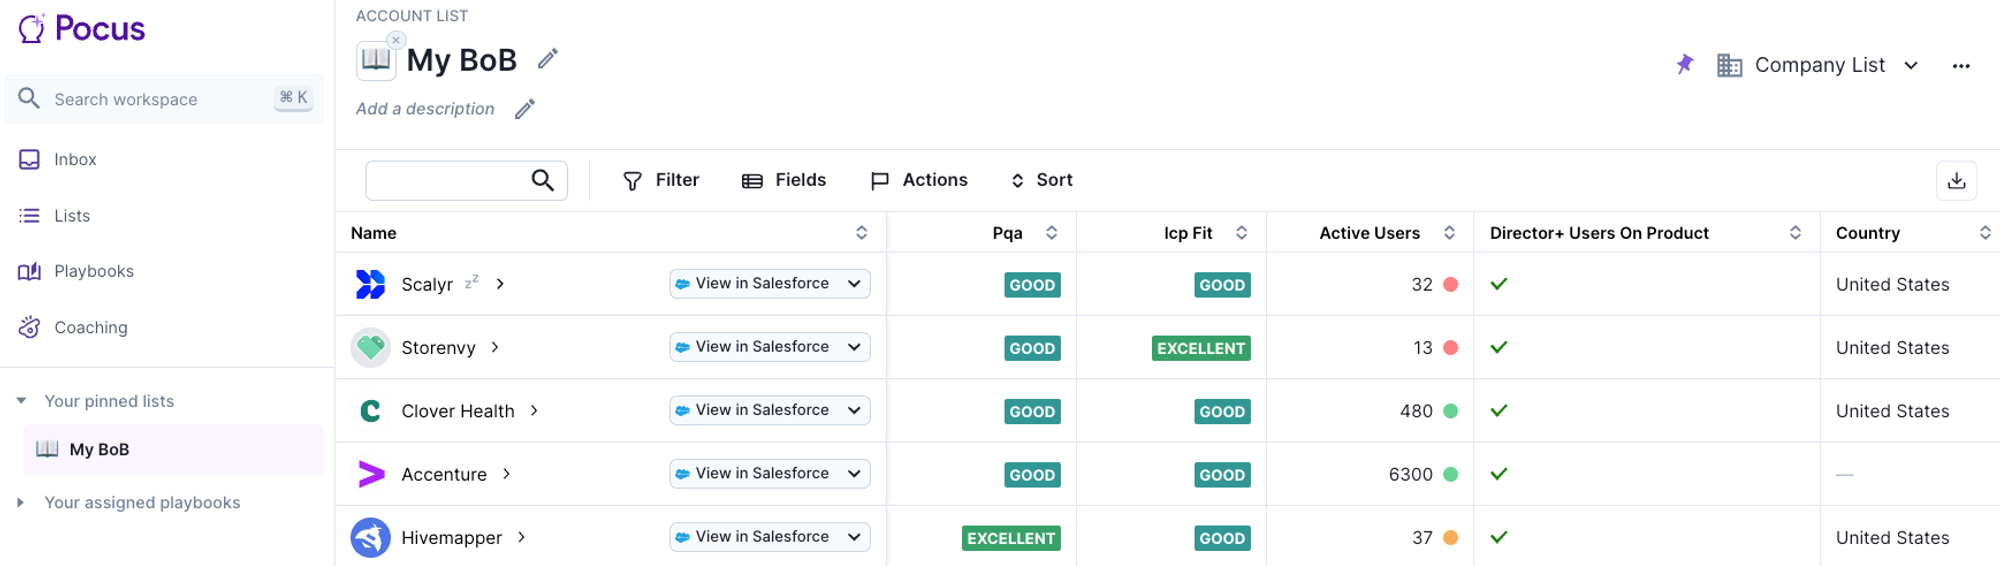
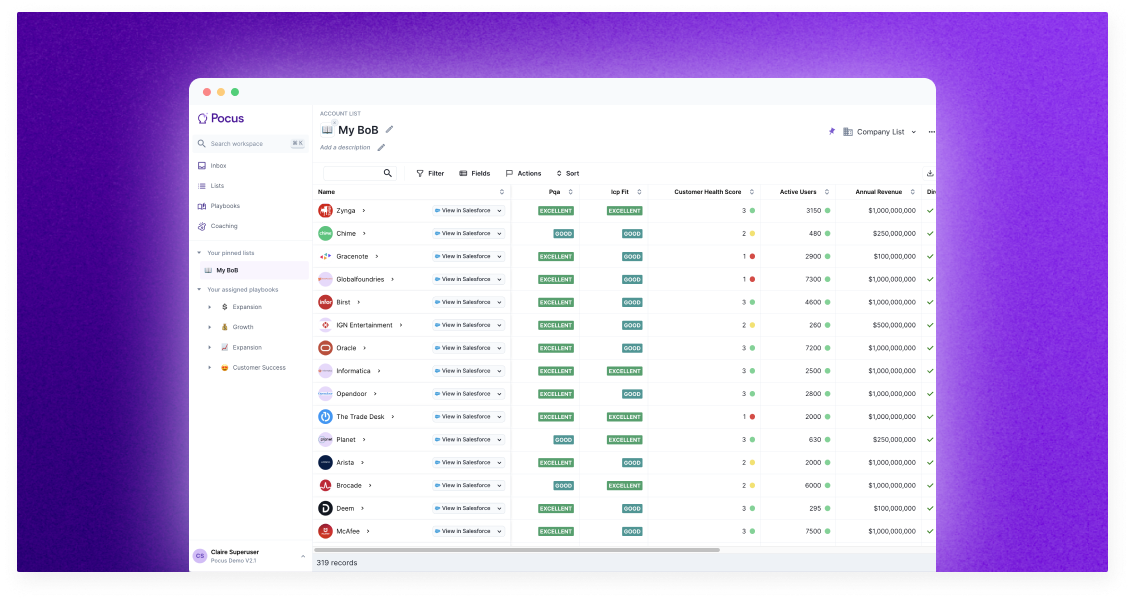
Pocus Lists are your place for exploration. With Pocus Lists, you can create a dynamic List of any of the objects you are pulling into Pocus (e.g., Accounts, Users, Workspaces, Opportunities). Slice and dice data with custom filters and fields all built off the power of the Revenue Data Graph.
Editing and Viewing Lists
Let's take some time to go over all of the different ways to customize and configure your Lists.
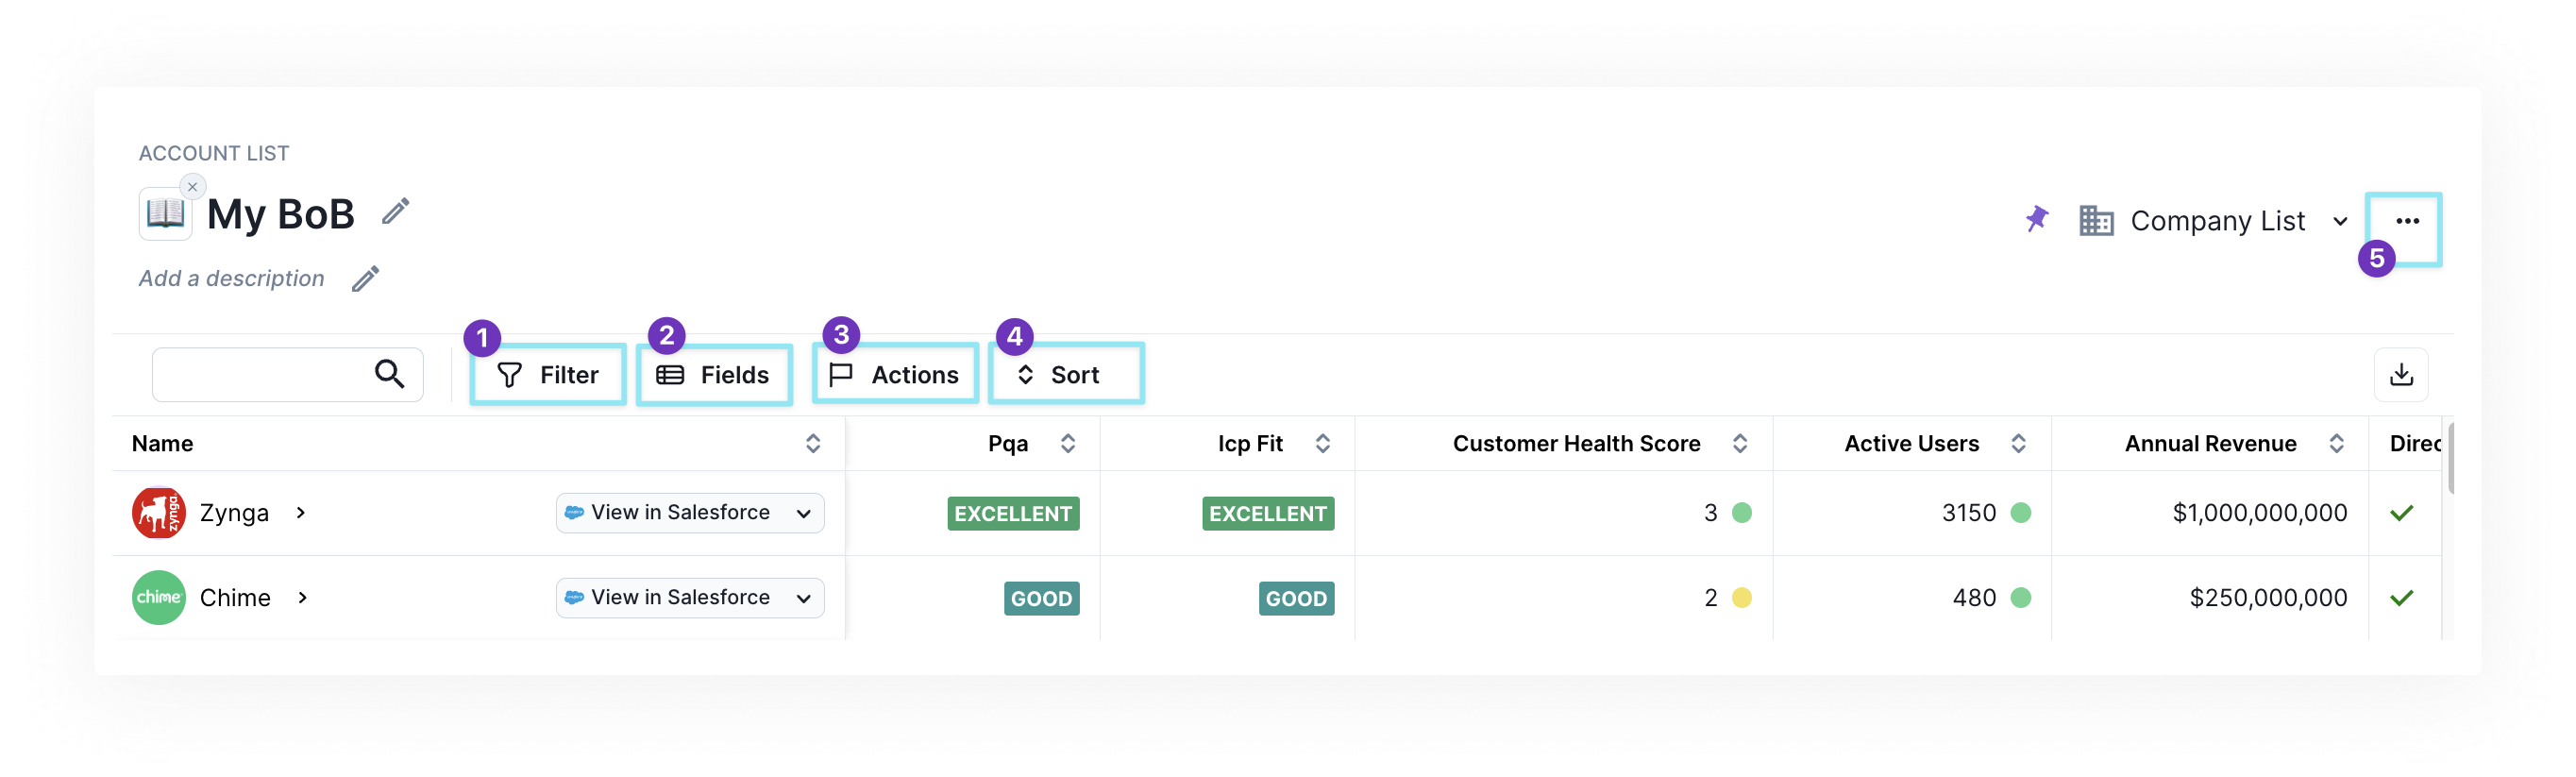
1️⃣ Filter
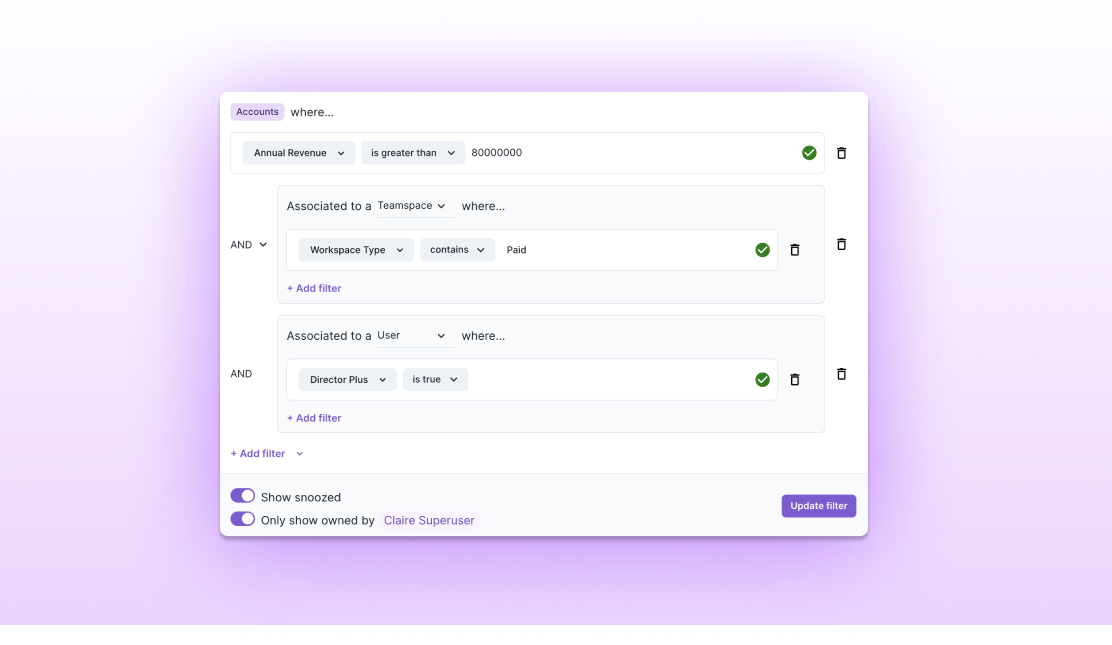
To apply a filter, click the Filter option from the toolbar. The filter on the List, like throughout the product, allows you to limit the number of records that are returned in the List. For an account list, you will have access to all account fields, signals, scores, and playbooks to filter on.
For more on filters take a look at Filter Deep-dive
On the List filter, you’ll also see two additional settings...
- Show snoozed
When toggled on, your snoozed records will show up in your List results. They will show with a 💤 icon next to them. Hover over the 💤 to see when that record will be un-snoozed. Toggle that setting off to hide snoozed records from your lists. Note: by default, this is toggled on for all lists. Learn more about Snooze
- Only show owned by…
This setting allows for the List to be dynamic based on who is viewing the List. When toggled on, the results will be filtered based on the ownership rules for the user viewing the List. When toggled off, all records will be visible ignoring ownership. See more about Routing.
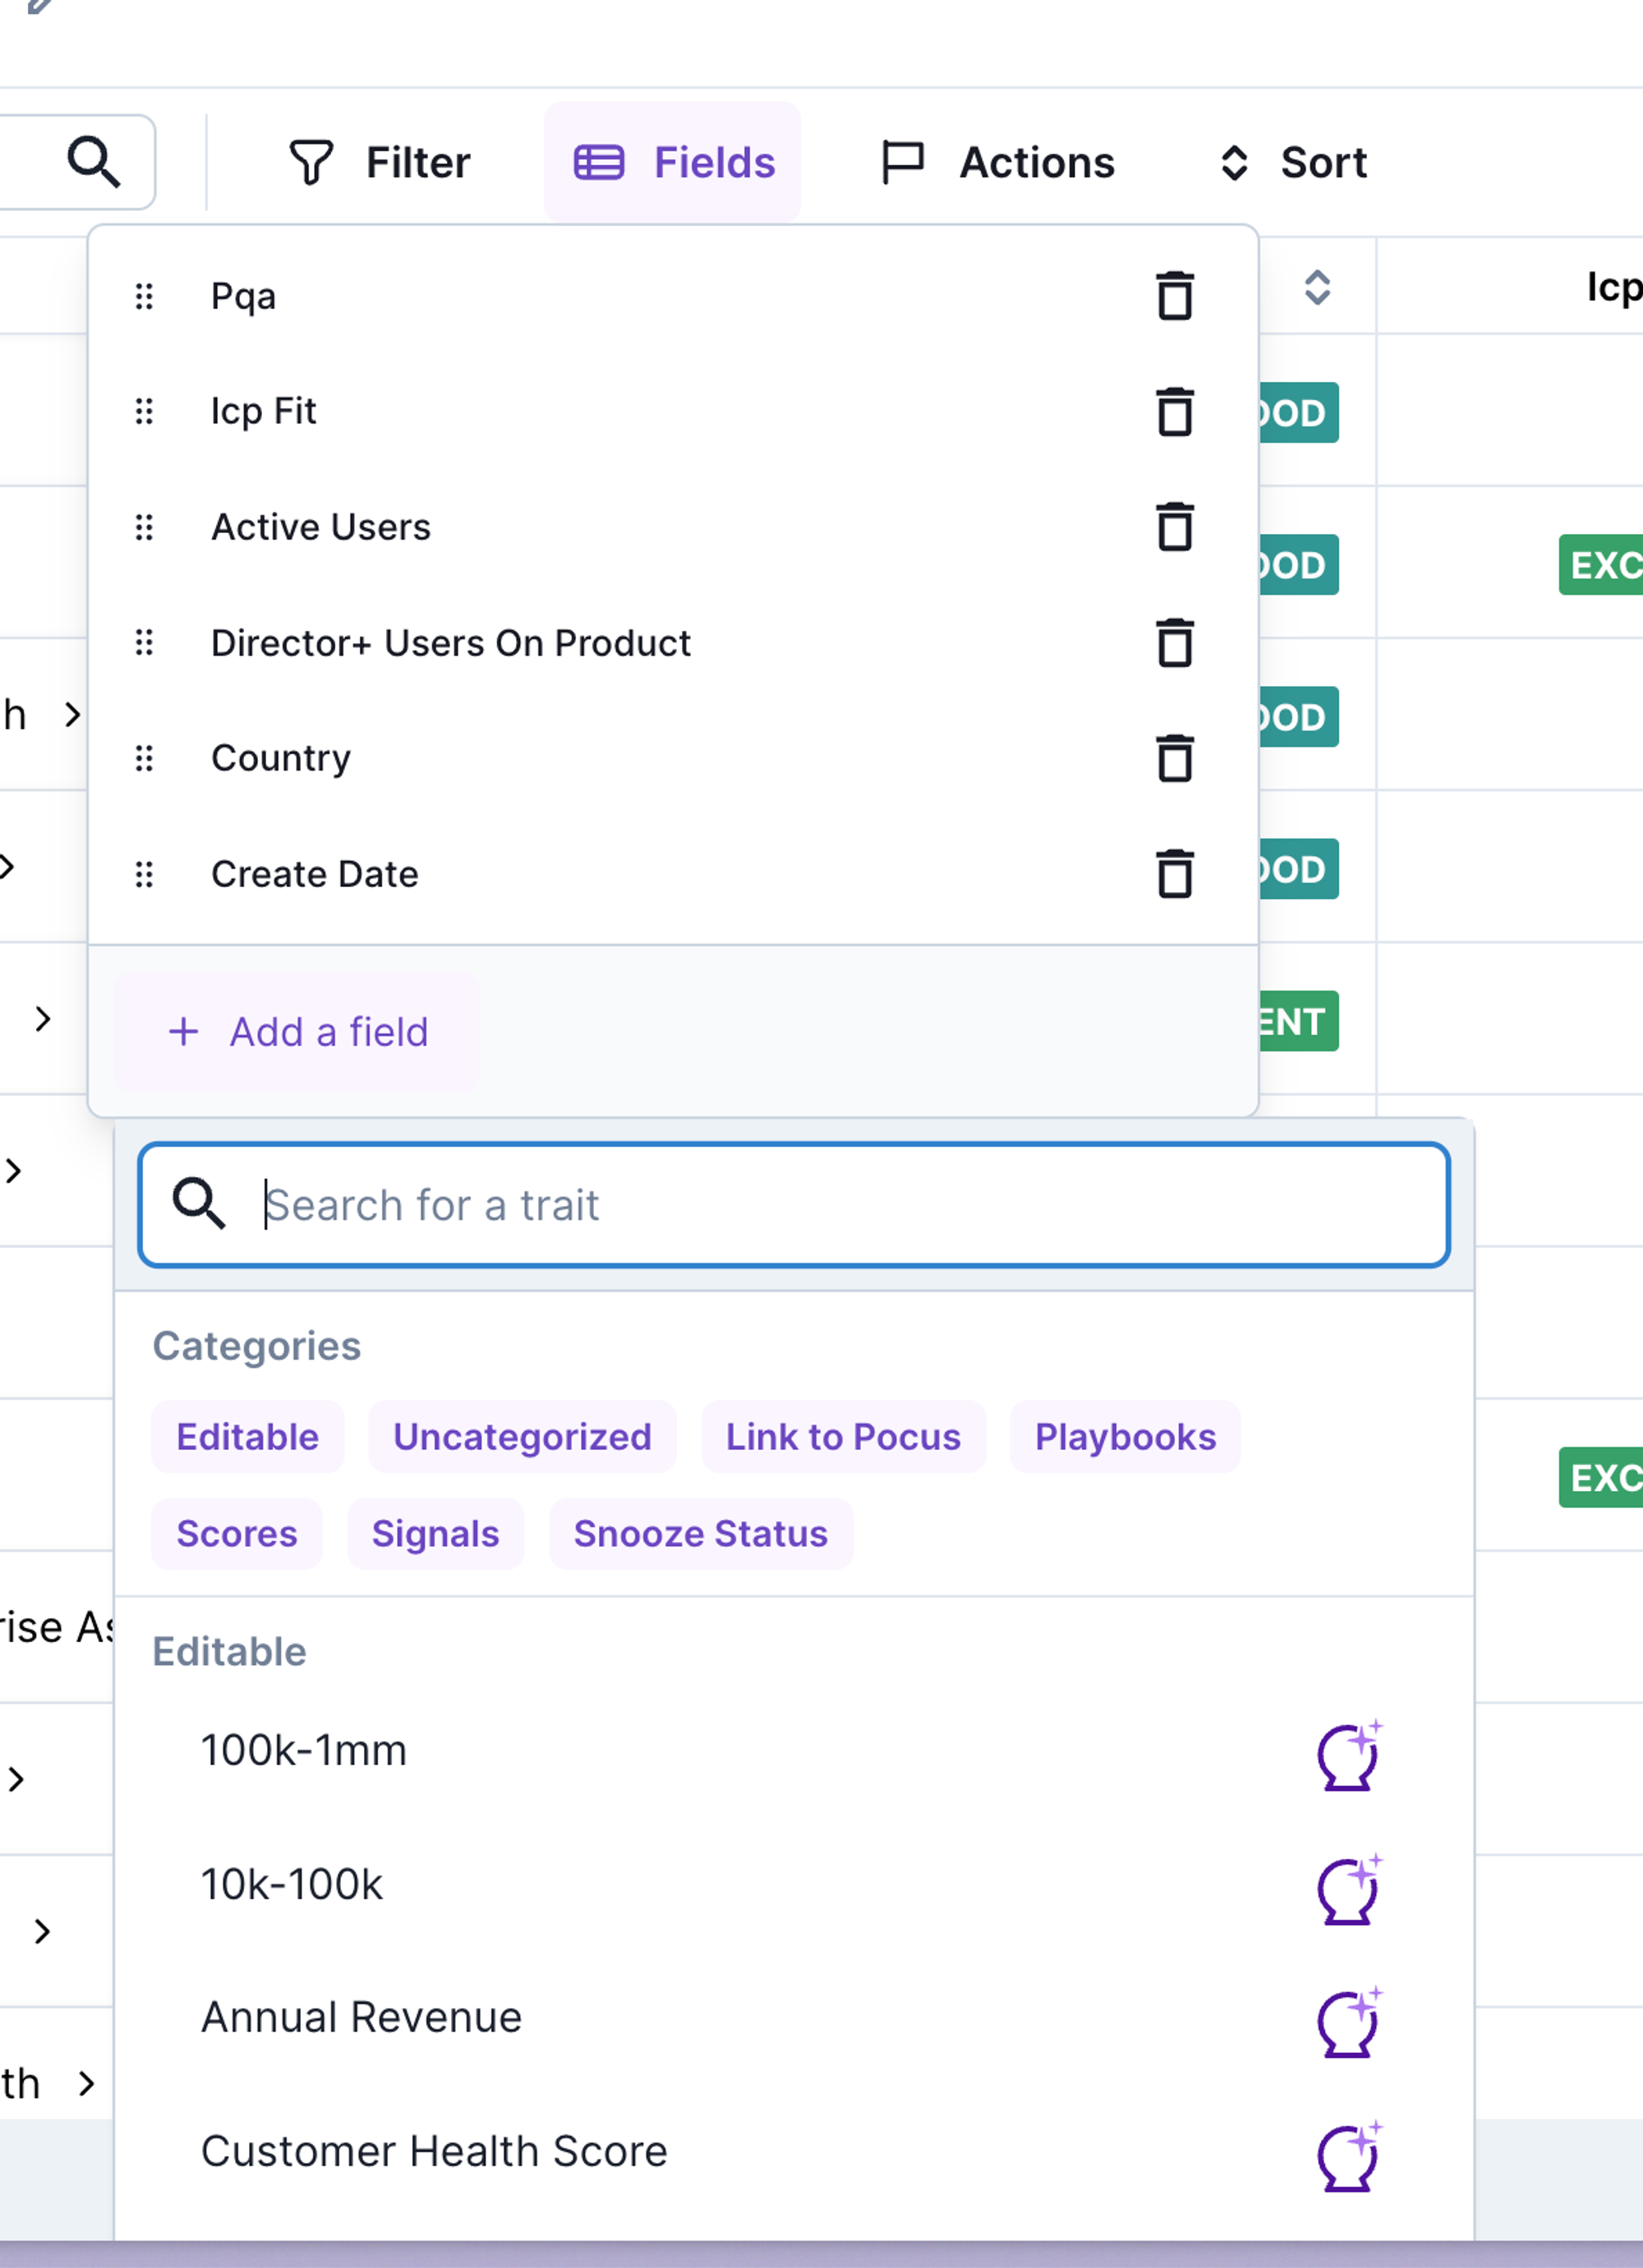
2️⃣ Fields
To customize what columns show in your List, click the Fields option from the toolbar. Here you can add additional fields by clicking + Add a field, remove fields by clicking the 🗑️ icon, and reorder the column order by grabbing the drag handle. To learn more about customizing field formatting, view Fields.
3️⃣ Actions
To customize what actions show in our List, click the Action option from the toolbar. Add any preconfigured action or link to appear as a button in your List.
4️⃣ Sorting
To adjust the sorting of results in your List, click on the column header for the field you’d like to sort by. For more complex sorting––sorting across multiple fields––click the Sort option from the toolbar. Add additional sort configurations and drag and drop them to determine the priority of the sort.
5️⃣ Additional Settings
- Drilldown Type: To select a different Drilldown to open when you click on a record in the List, click on the [⋯] menu. Click
Switch drilldown typeand select from the available configured Drilldowns. Learn more about customizing Drilldowns. - Download: Users with CSV downloader permissions can download up to 10,000 records from the lists that they create. This can be helpful if doing bulk prospecting in another tool.
- Share: This will copy the URL for the List. Personal Lists can be shared this way.
- Duplicate: This will make a Personal copy of the current List.
- Delete: This will delete the List for all users with access.
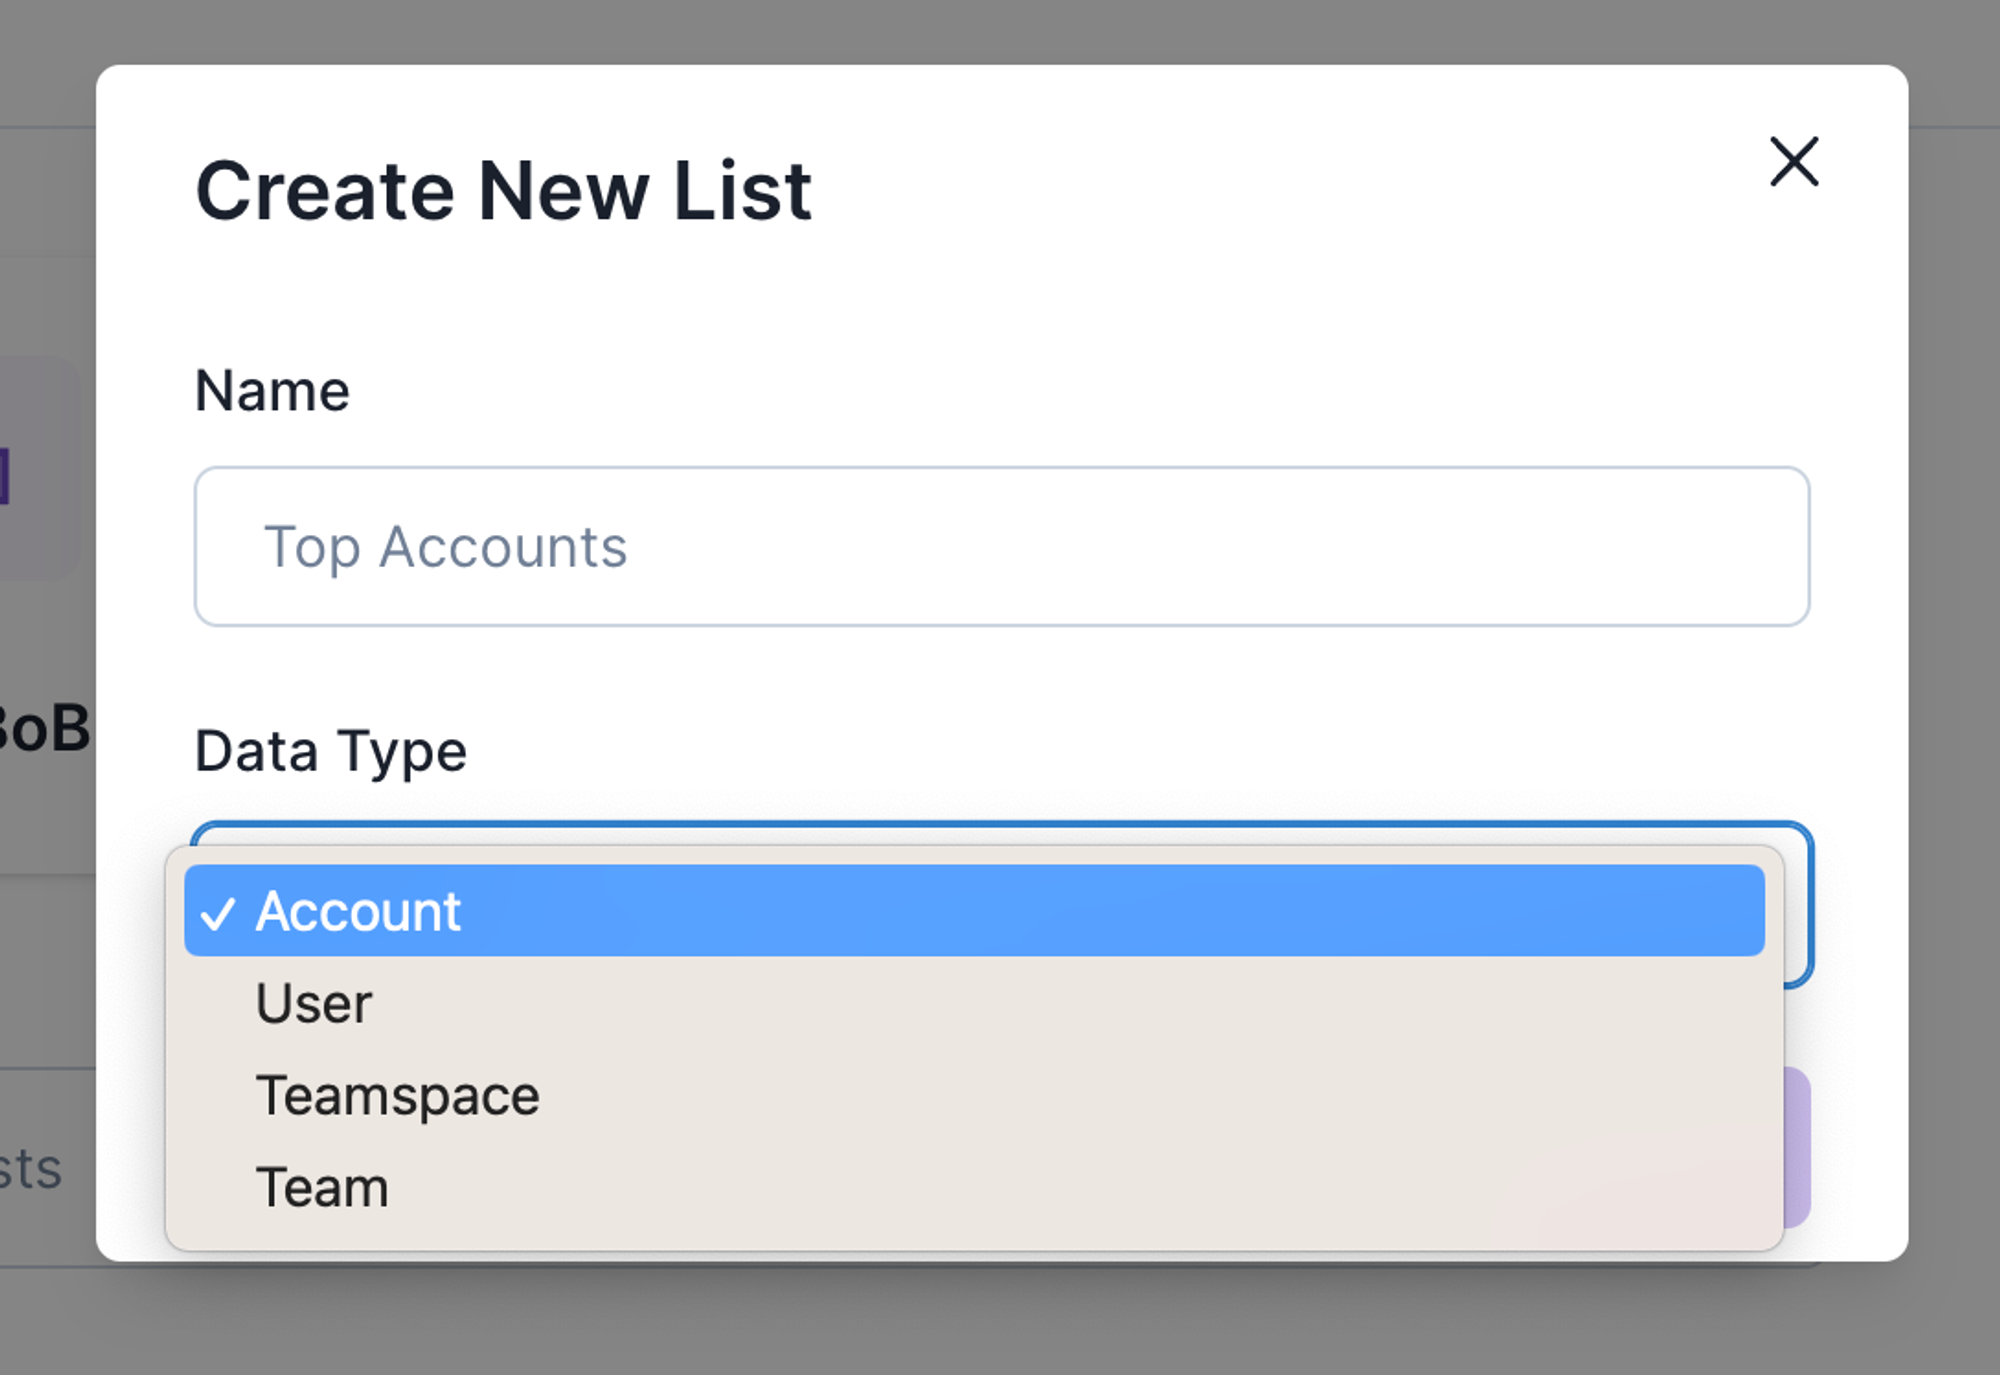
Creating a New List
When creating a list, you’ll first be asked to select what object you want to see (e.g., Accounts, Users, Workspaces). Once the list is created, this is no longer editable. Don’t worry you’ll still have access to some of the associated data, think of this more as what records you actually want to see. By default, new lists will be created as Personal Lists only visible to you.
Looking for List inspiration?Common Lists we see our partners make:
- My BoB: Create a list filter down to all your accounts, so you can easily slice and dice your book with the power of Pocus' Revenue Data Graph.
- Upcoming Renewals: Stay alert to any upcoming renewals, with a go to place to view renewals alongside usage.
- All admins in My BoB: Have a quick way to access all your key stakeholders and take bulk action.
- My Opportunities: Power your pipline hygeine routines with data from all your sources.
- Ad-hoc lists for upcoming events: Easily pull a list of users to invite to a local event or a webinar based on intent signals.
- Visit our Pocus Lists Library for more ideas!
Sharing and Saving Lists
Lists are a great place for personal discovery. But there’s also a benefit in sharing Lists with others on your team or having leadership create some go-to Lists that everyone can access. This is why we’ve introduced different List types. In your List directory, see and sort by which Lists are Personal and which are Company Lists.
Personal Lists
Personal Lists are only visible to you in the List directory, but you can share them with others by sharing the list URL. All end-users except Read Only have the ability to create Personal Lists. While you can share the URL with others, only the owner can edit their Personal List. When the owner of a Personal List makes a change to that list, they can either Discard Changes or Save to update their current Lists. Those with Permissions can convert Personal Lists into Company Lists.
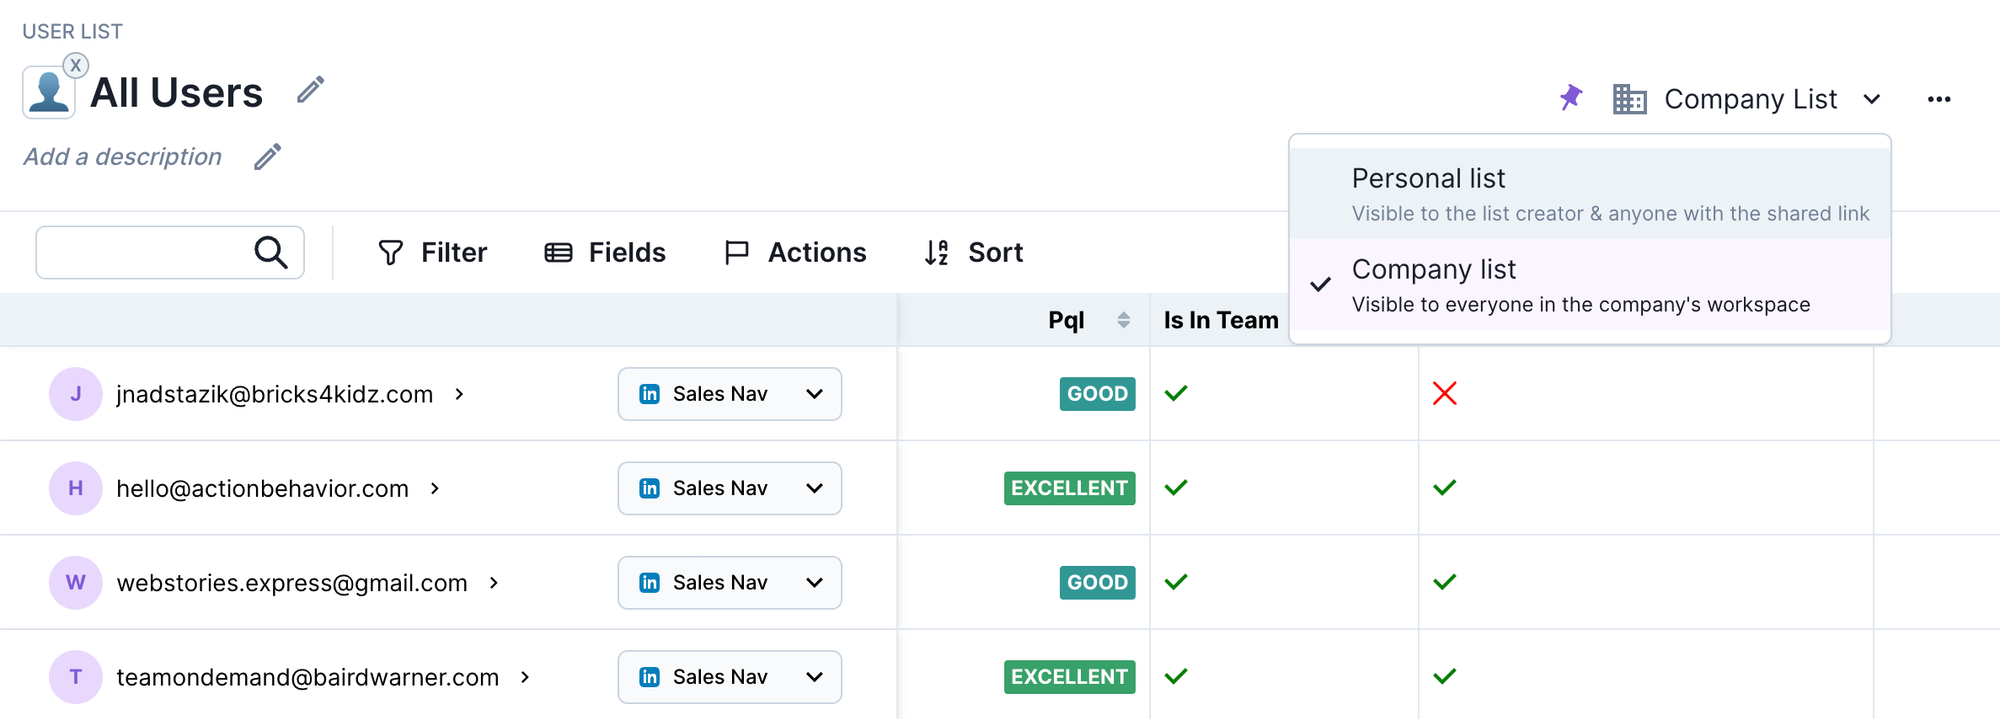
Company Lists
Company Lists are Lists that are visible to all users in the workspace. Rep users can make temporary changes to a Company List while viewing or save their changes by Saving as a Personal List. Only those with Permissions can make changes that overwrite the Company List configuration.
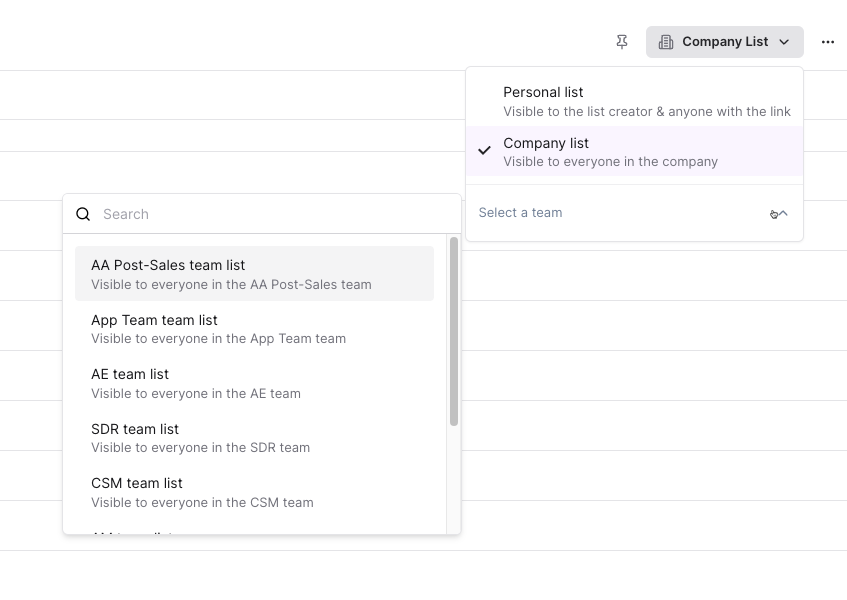
Team Lists
Team Lists are Lists that are visible only to Rep users in the selected Team. Just like Company Lists, Rep users can make temporary changes to a Team List while viewing or save their changes by Saving as a Personal List. Only those with Permissions can make changes that overwrite the Team List configuration. By default, RevOps+ user permissions see all Company and Team Lists.
You can change a list to a Team List by selecting the list type drop down in the upper right corner while viewing a list, then use the Select A Team drop down to choose the appropriate team.
Impersonate to see others listsIf you impersonate a user, you will see their personal and team lists as they view them.
Pinned lists
Select the 📌 icon in the top right when viewing a List or in the List directory to pin a List to your sidebar. You’ll then be able to access that List with one click if you navigate to another page in Pocus. Your pinning preferences are all personal to you and not shared across the workspace
Tip:Create a Book of Business view and 📌 it to your sidebar for quick access for territory planning.