Google Slides
Learn how to efficiently create decks for business reviews, meetings, and more
When creating presentations for specific Accounts, Workspaces, or any other item you have synced into your Pocus workspace, the Google Slides Action can be leveraged to streamline the process.
Using an existing template, this action will replace specified values with a data from a specific data row in Pocus. Once setting up the action and updating your template with the values to be replaced with Pocus data you can create your report with different data with one click!
Setting up the Google Slides Action in Pocus
-
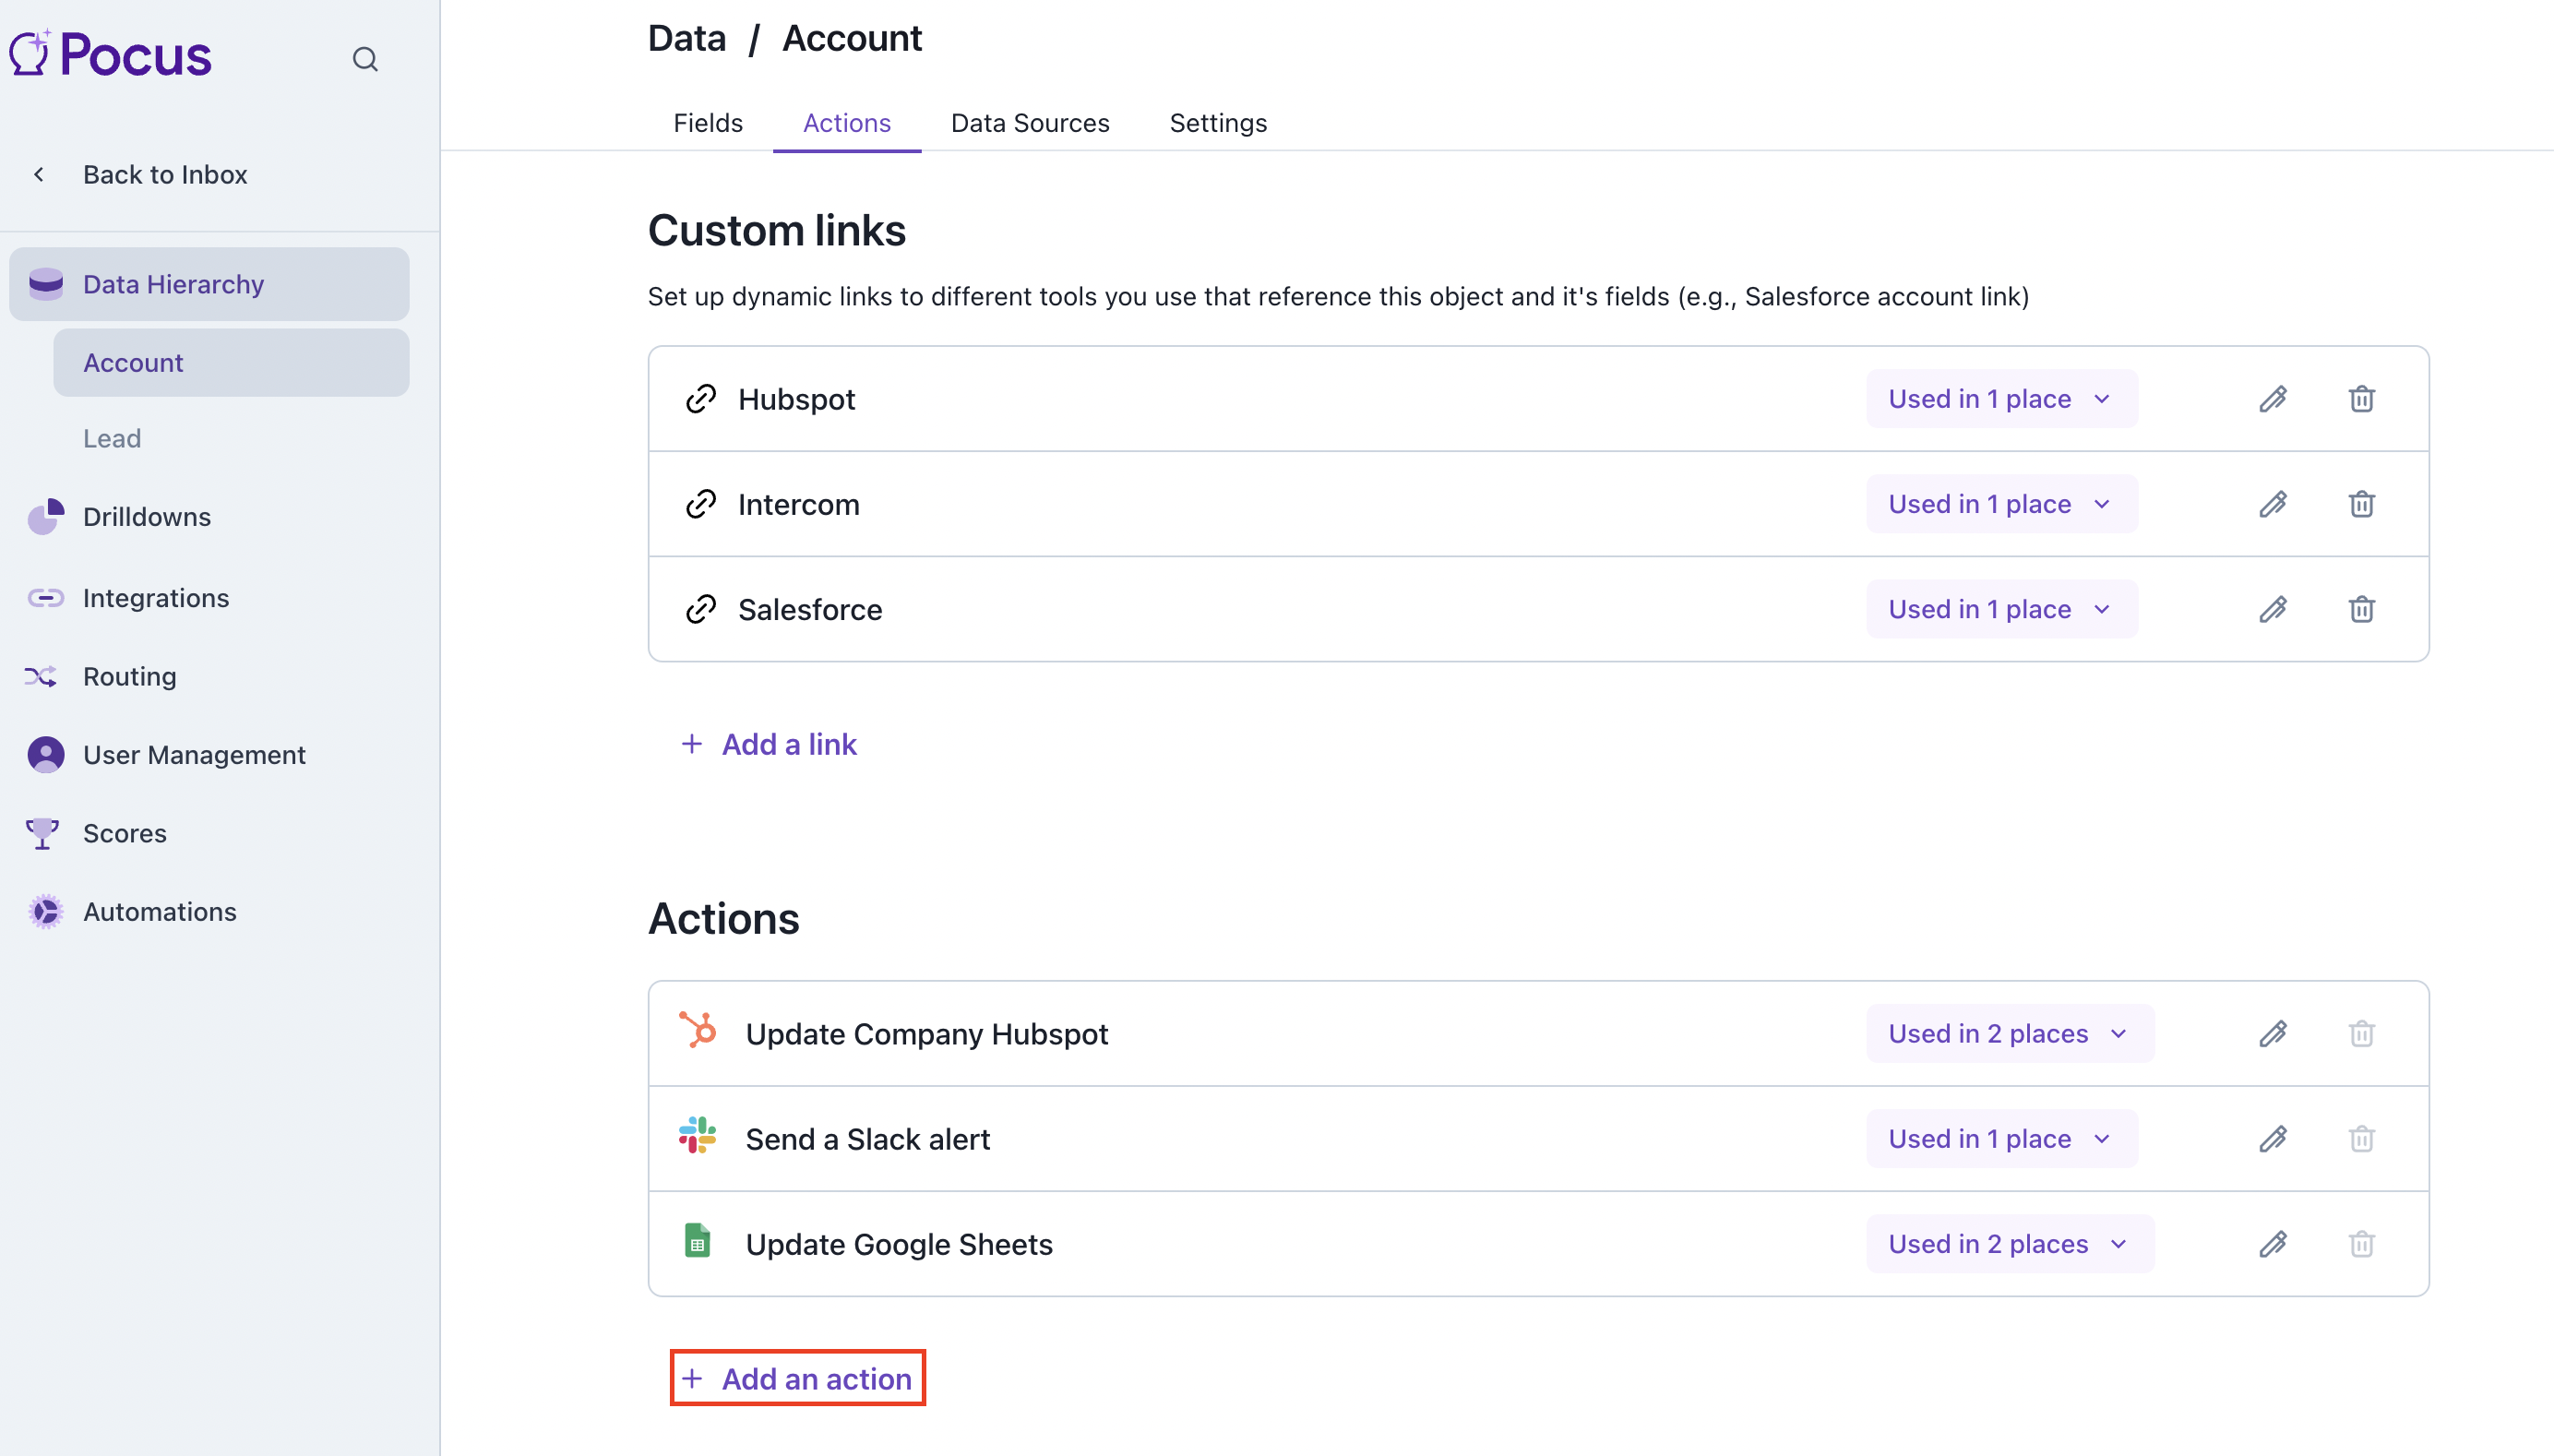
Navigate to the Workspace Settings page and select the item you would like to add your new action to. Once selecting the item, navigate to the "Actions" tab and at the bottom of the resulting page click Add an action
-
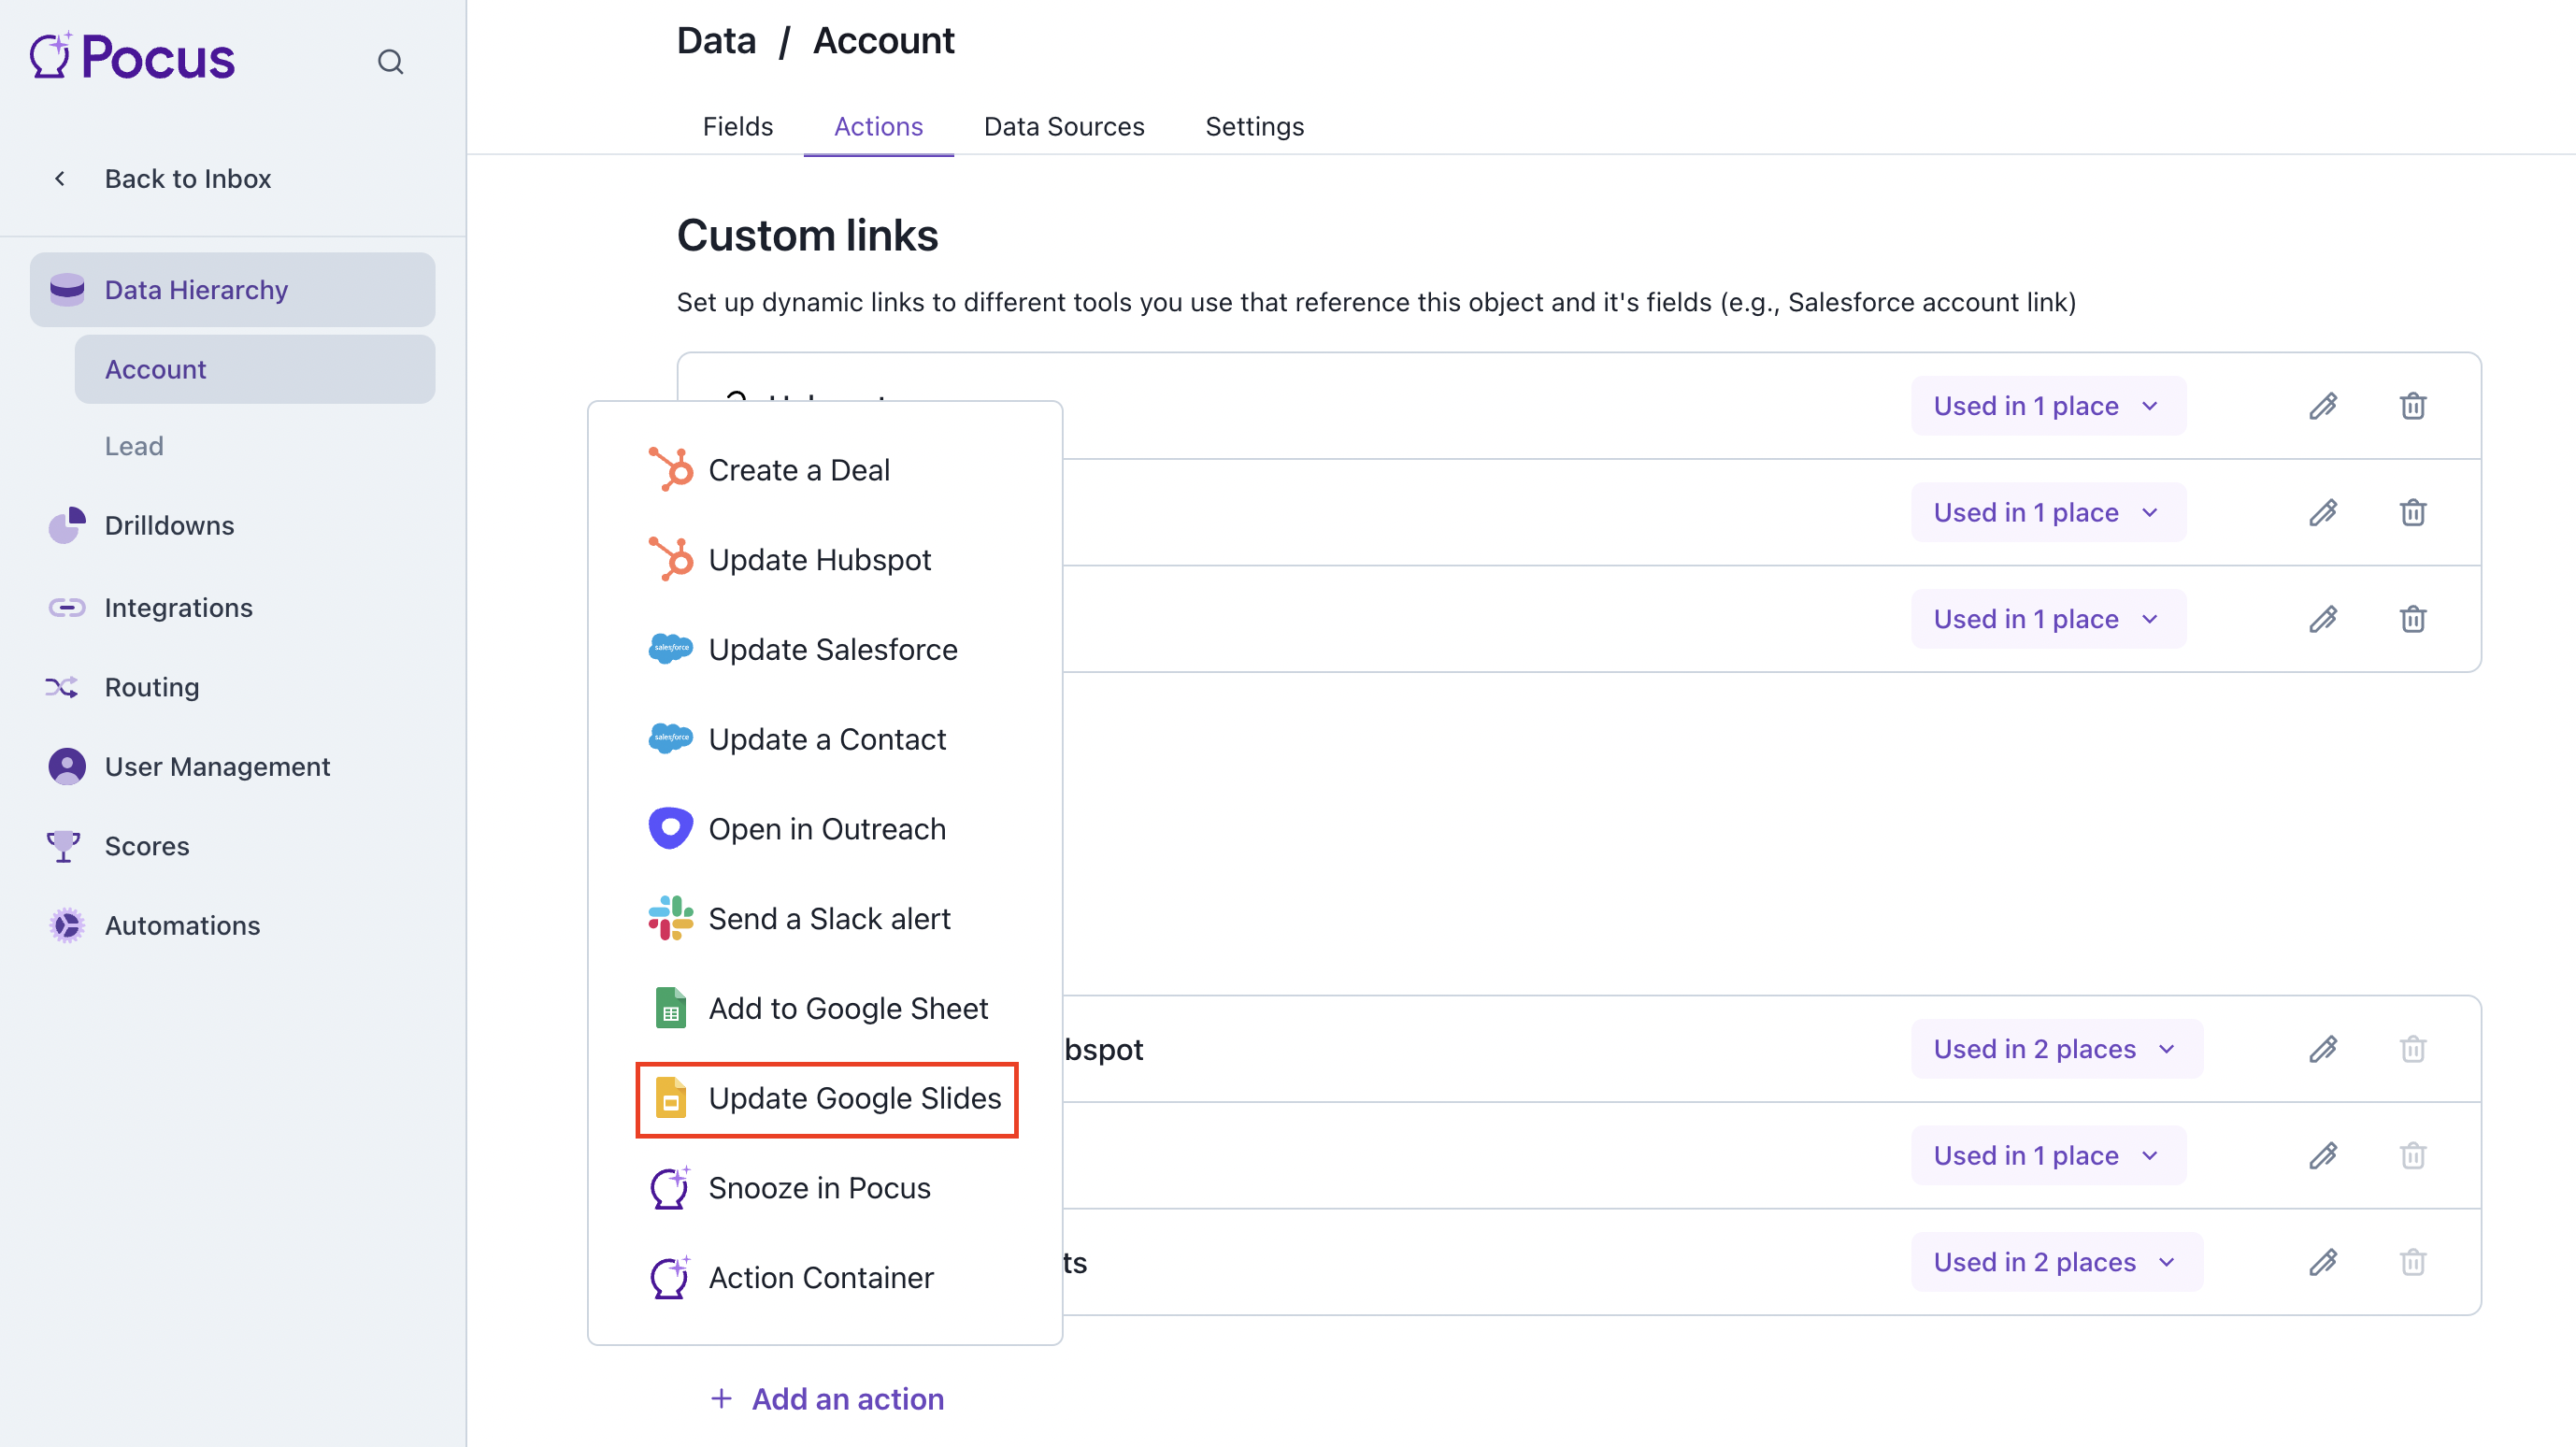
Select the Update Google Slides action type
-
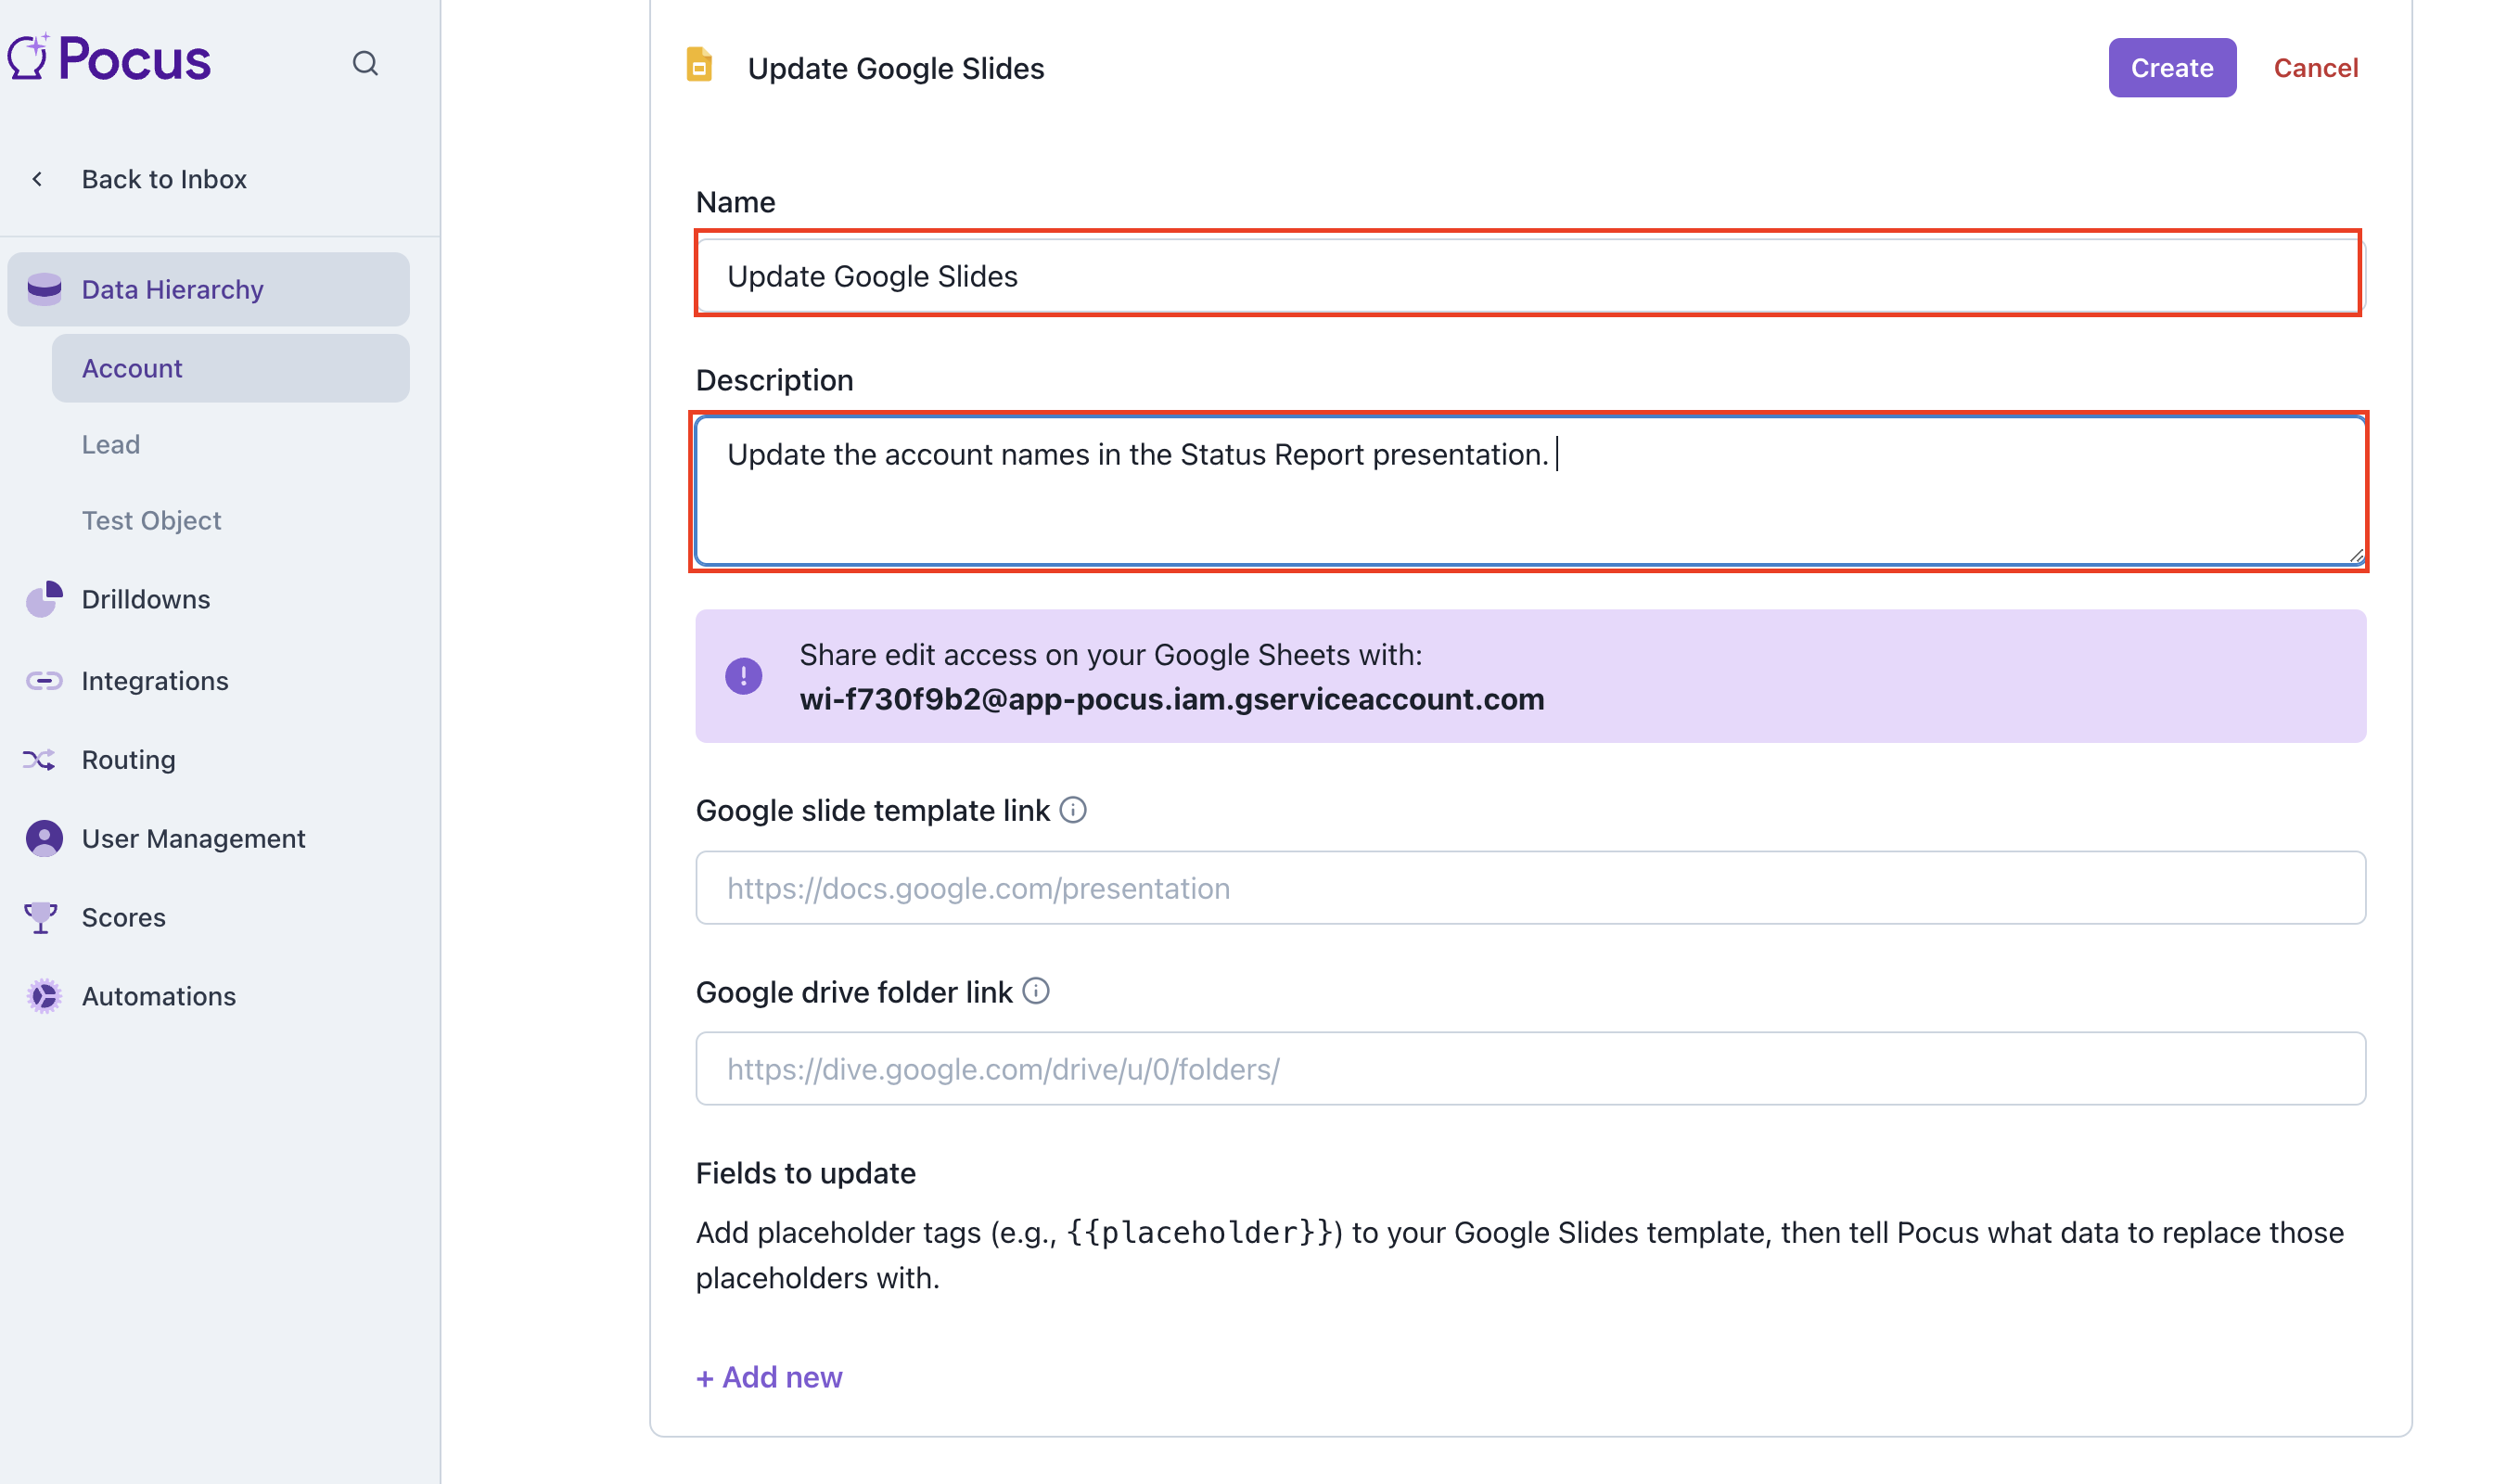
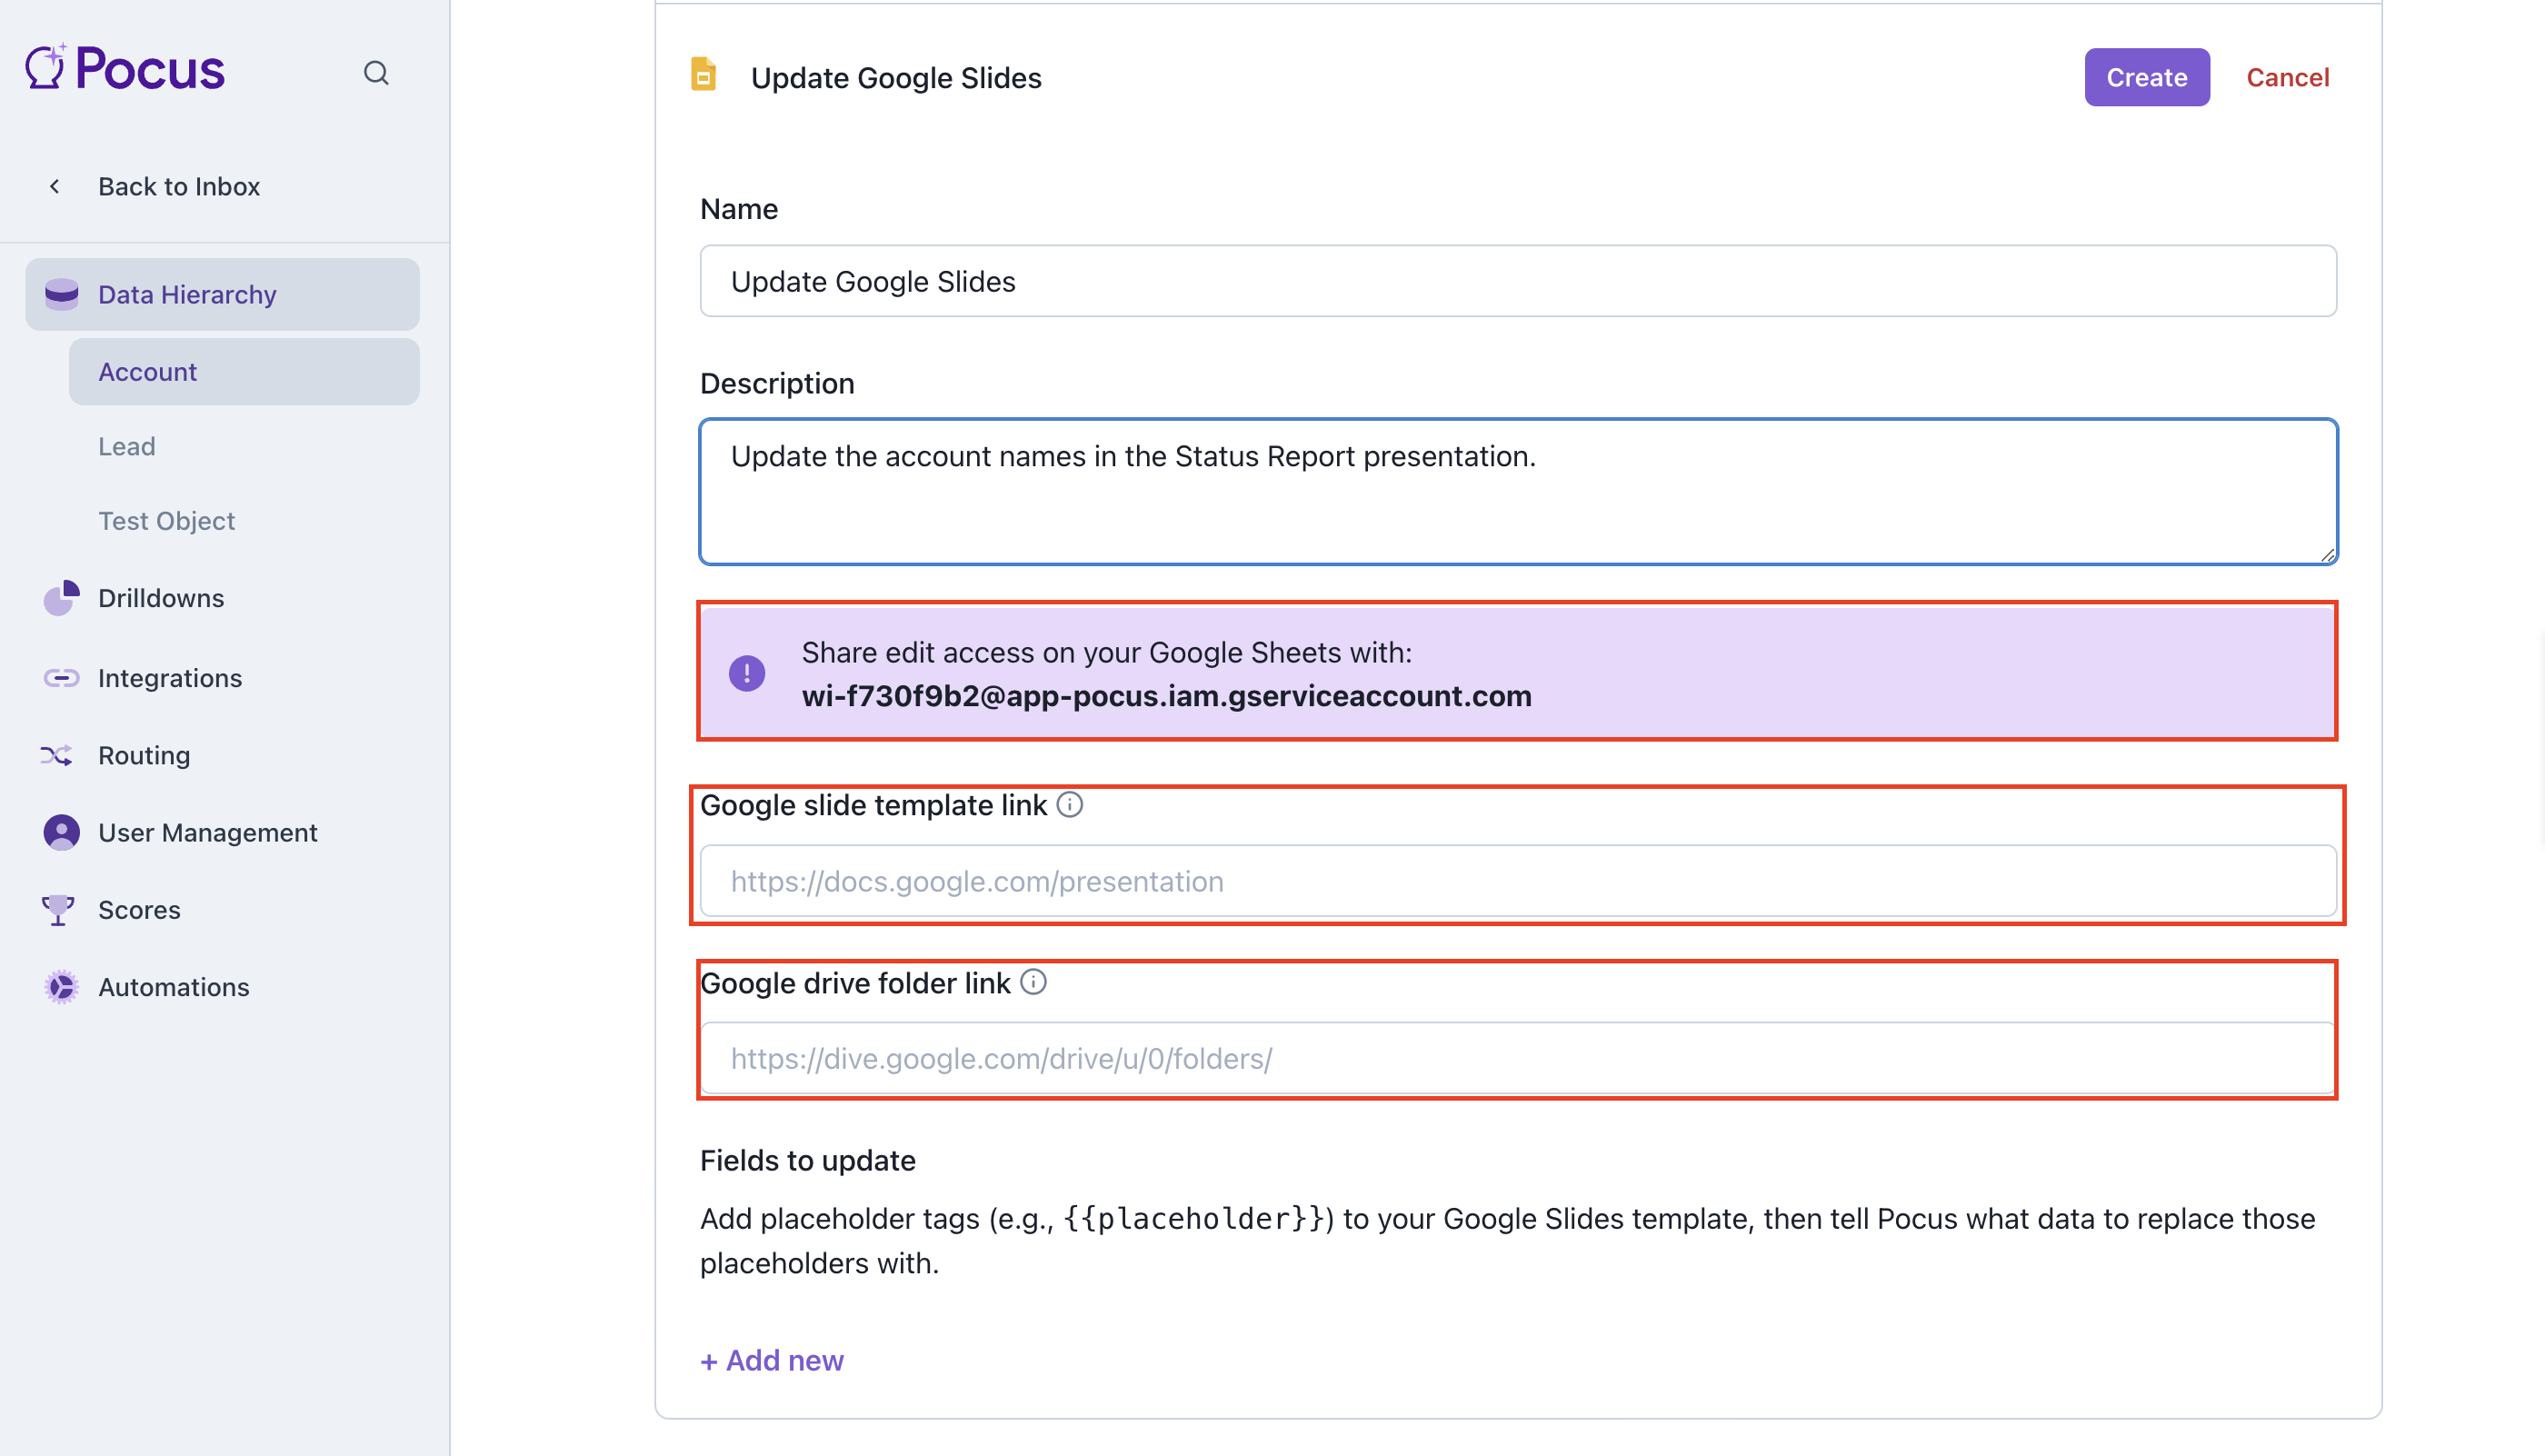
Enter your preferred name for this new action and add a description of what the action does
-
Give edit access to the relevant presentation and Google drive folder with the provided Pocus service account email. See GSuite Integration Article if you haven’t yet configured a service account. Once this is done add the URL of the Google Slide presentation and Google Drive folder to the input fields
-
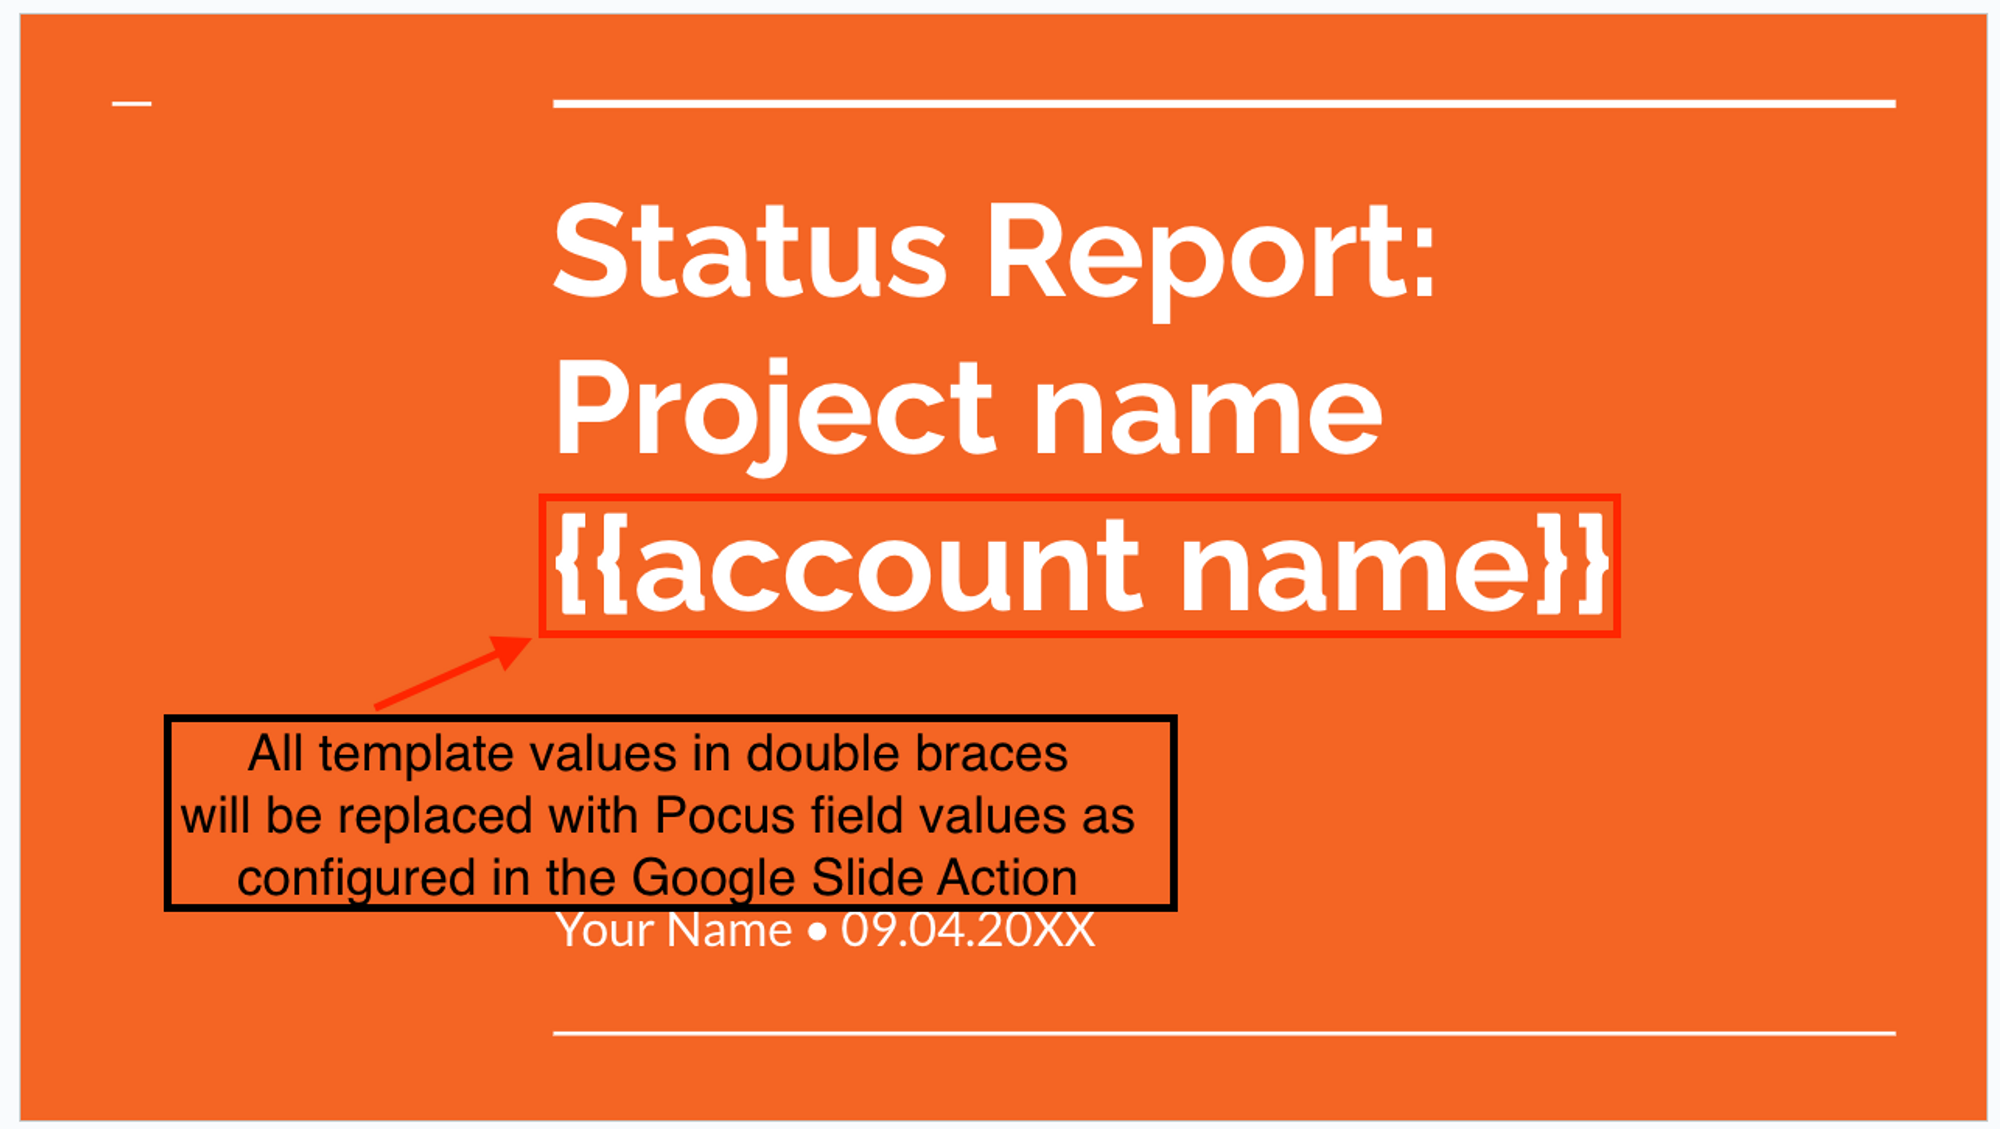
Click "Add new" to provide Pocus with the placeholder text you would like to be replaced and the field value(s) you would like it to be replaced with. Select "Add Data" to add the field select box. In our example below we are replacing all instances of
{{account name}}in our presentation with the name of the account the action is being invoked for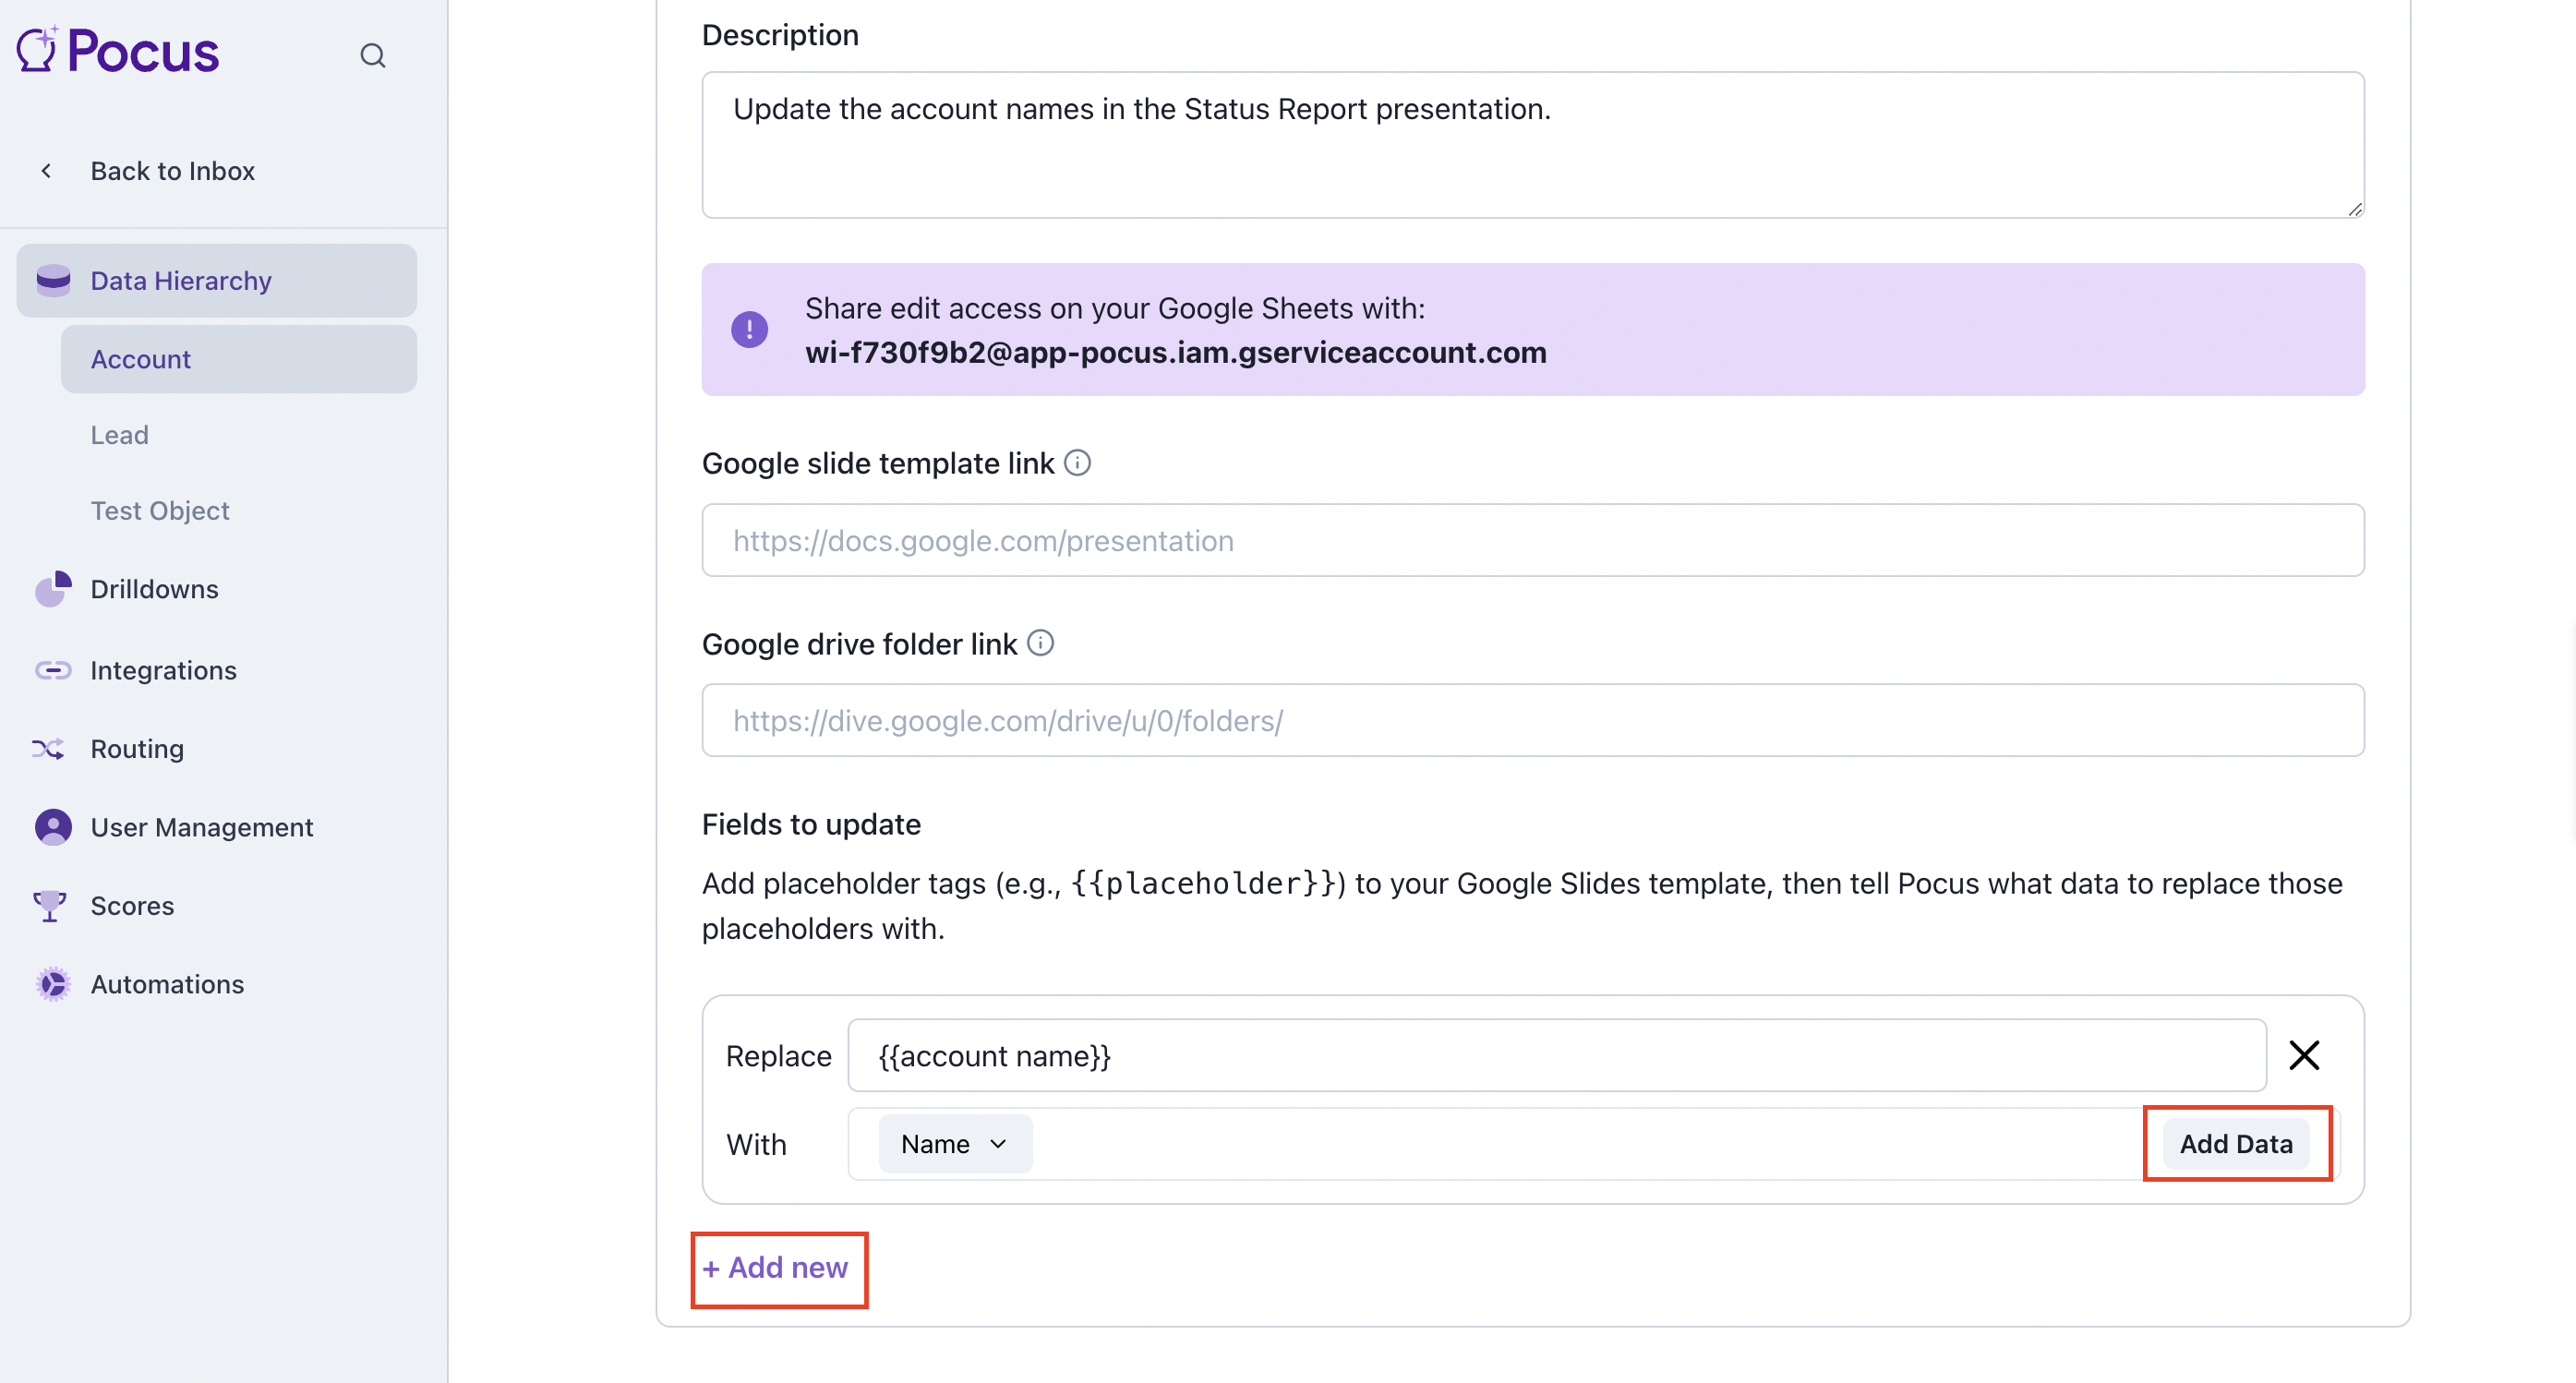
-
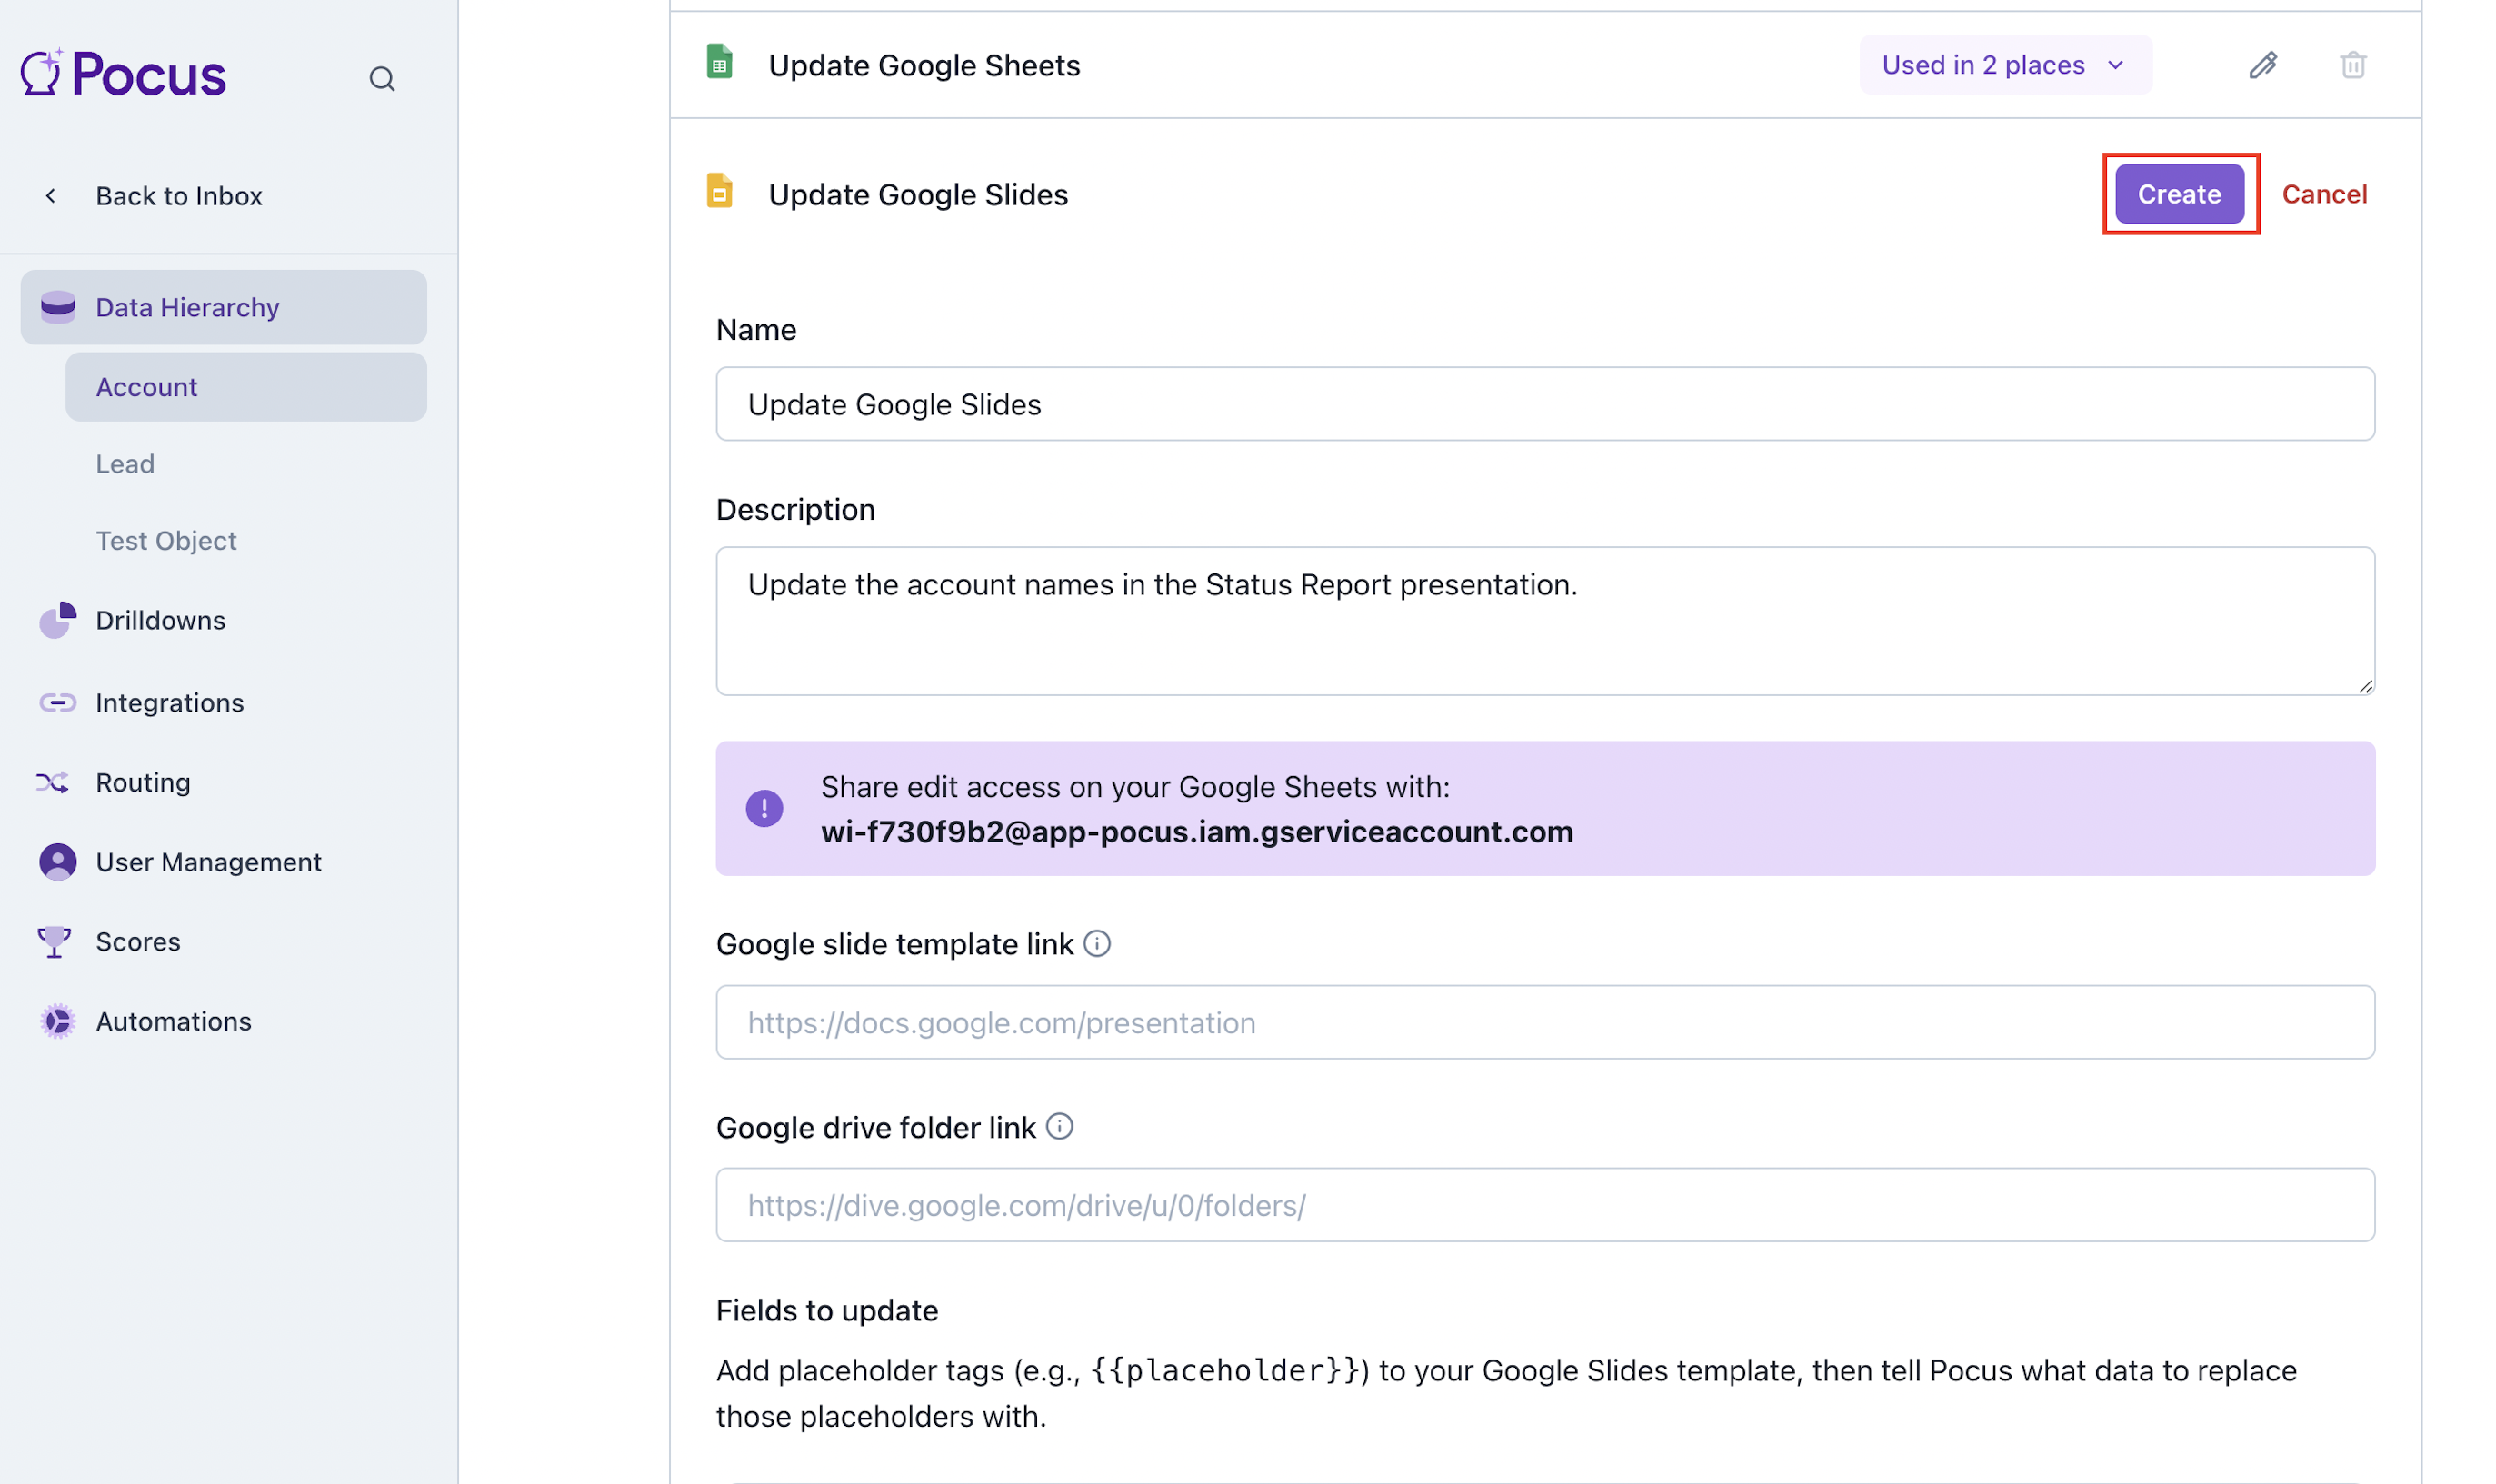
Once you have all the placeholder values and the fields they are to be replaced with selected, save the action configuration by clicking "Create" at the top of the window
End Results
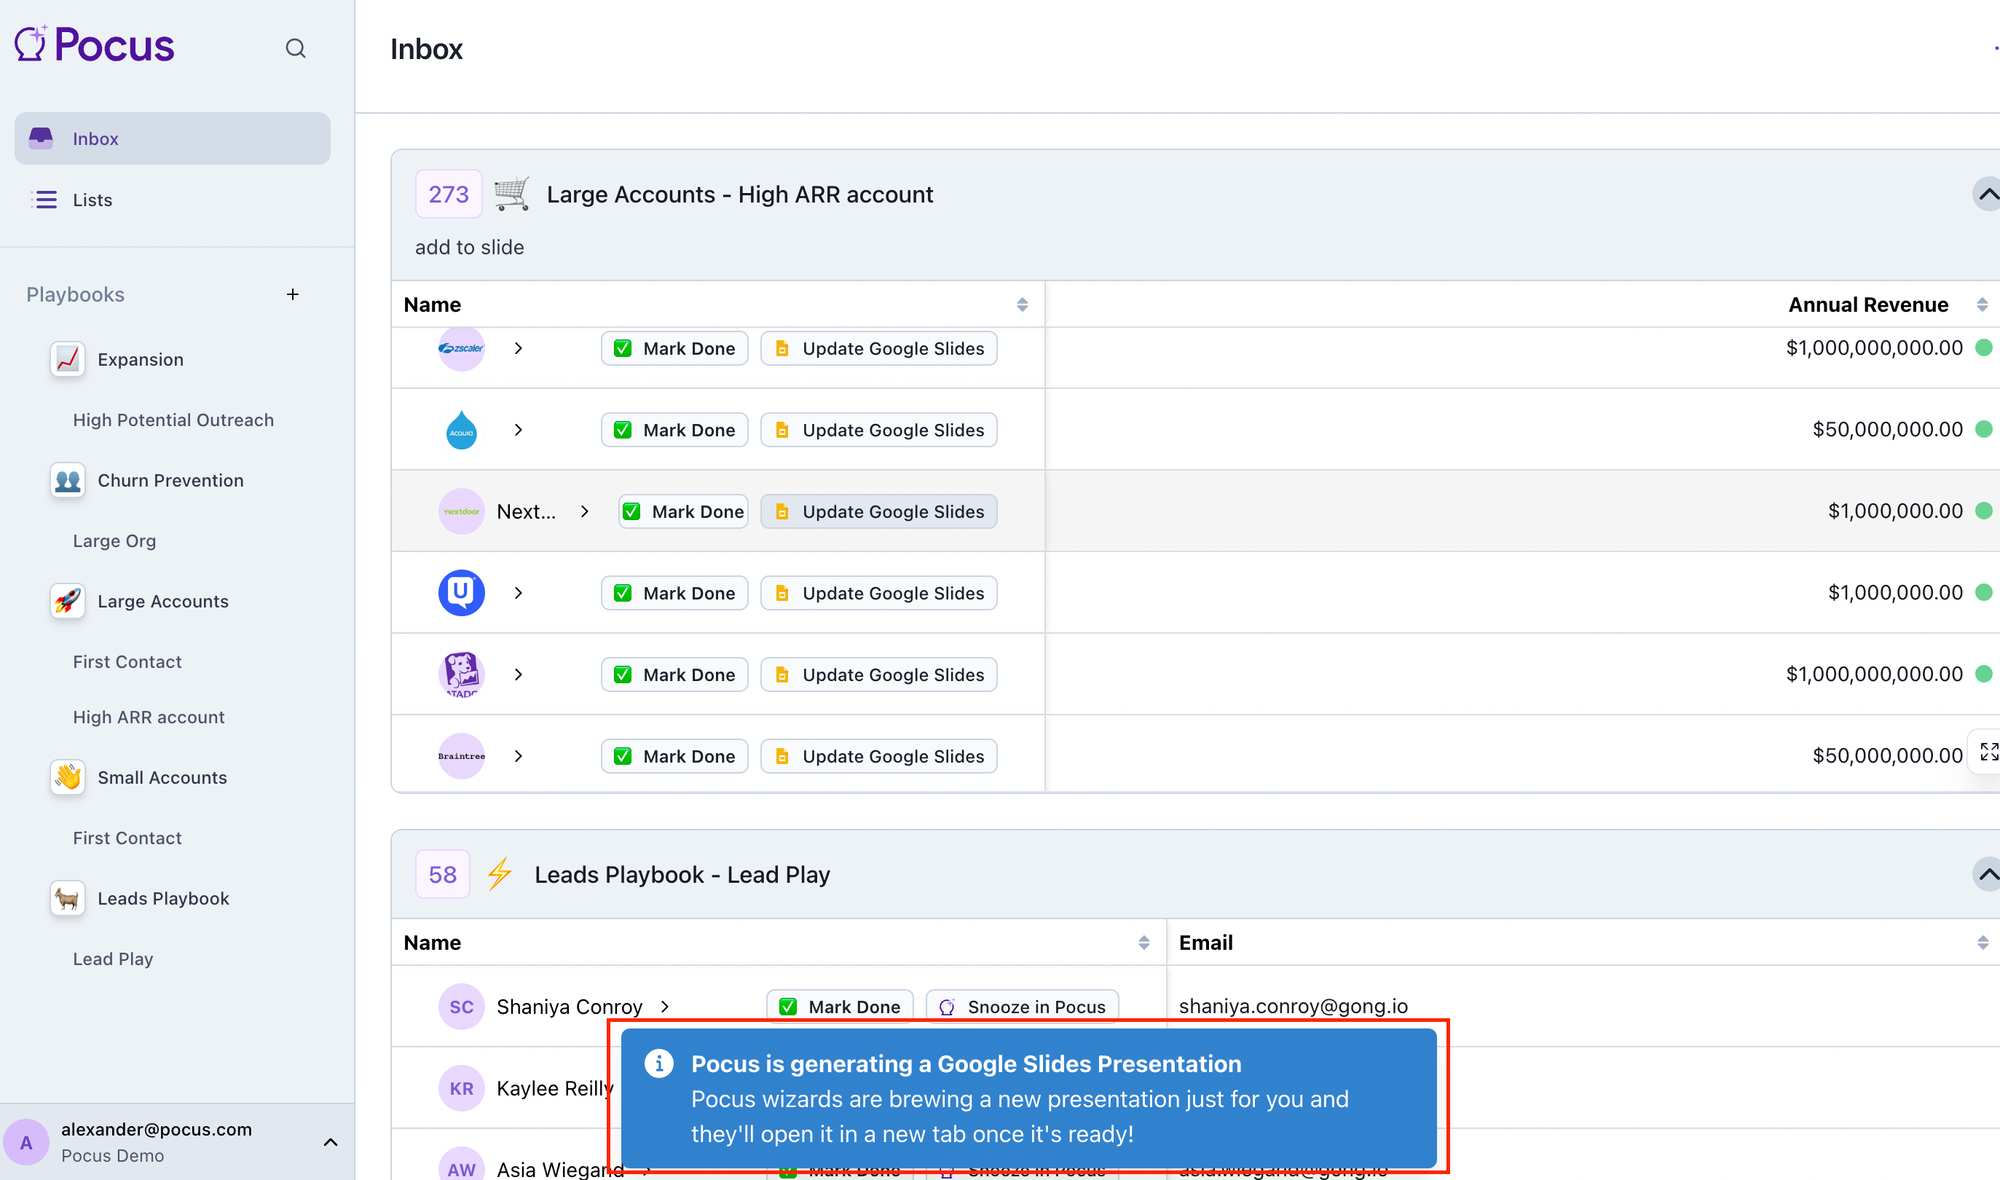
Enabling Pop Ups
When invoking this action on an object you will receive a notification like the one shown below. Then Pocus will attempt to open the newly created presentation in another tab. Pop ups will need to be enabled to have this new tab opened successfully.